know-how:etc
Inhaltsverzeichnis
![]()
RAID
MegaRAID Controller
- Mit Video von youtube: https://www.youtube.com/watch?v=i7cyLLsLM8A
- Im Wesentlichen beim MegaRAID Controller einloggen die Platte identifizieren „start locating“ und dann „Offline“ setzen - Tauschen und wenn auto rebuild aktiviert ist wird gleich rebuildet
- Im Dashboard gibt es eine Option „Silence Alarm“ um den akkustischen Alarm zu deaktivieren
- Achtung RAID10 lässt sich nicht erweitern ohne das ganze Array zu löschen (https://www.broadcom.com/support/knowledgebase/1211161503168/how-to-expand-an-array-on-megaraid-controllers-adding-drives-to-)
- Predictive Failure Count beim Controller - E-Mails zB:
Controller ID:  0   PD Predictive failure:
    -:-:3
Event ID:96
Generated On: Mon Sep 02 14:29:04 CEST 2019
- Festplatte wird „bald“ kaputt werden - Austausch empfohlen - Slot beginnt orange zu blinken
- Sicht auf den Server - In diesem Beispiel bezieht es sich auf Slot 3 im Server

LSI Storage Authority Avago
- Beim Versuch des Web Logins zur verwaltung des Controllers wird immer wieder LSI Storage Authority Error Code 49 Invalid Credentials geworfen
- ACHTUNG SPRACHE DES eingesetzten OS - Gruppe der „Administratoren“ bei deutscher Windows Version hat vollen Zugriff nicht Administrators
* https://www.thomas-krenn.com/de/wiki/LSI_Storage_Authority_Error_Code_49_Invalid_Credentials
Lösung

Zur Behebung des Problems passen Sie die Konfigurationsdatei LSA.conf folgendermaßen an:[1]

    Stoppen Sie den LSAService in Windows Services
    Editieren sie die LSA config file (LSA.conf)

        C:\Program Files(x86)\LSI\LSIStroageAuthority\conf\LSA.conf

    Überprüfen Sie folgenden Befehl: full_access_groups = Administrators

        Hier muss je nach Sprache dies angepasst werden:
            Französisch = full_access_groups = Administrateurs
            Deutsch = full_access_groups = Administratoren
            Spanish = full_access_groups = Administradores
            Russisch = full_access_groups = Администраторы oder Administratory

    Sobald Sie Punkt 3 durchgeführt und gespeichert haben, müssen sie den LSAService neustarten.

Nach dem Ausführen dieser Schritte sollten Sie sich wieder ohne Probleme anmelden können.
Einzelnachweise
IPMI
ThinkServer Server Spezielles
- Zumindest bei TD340 Remote Management
- Achtung kein vollwertiges KVM Remote Management möglich über Konsole
- Es muss ein Hardware dongle am Mainboard gesteckt werden !!! d.h. Server runterfahren raus aus dem Rack , zerlegen ..
ThinkServer Management Module
- Default Username/Passwort ist NICHT unbedingt lenovo/lenovo (Server: Lenovo ThinkServer TD340 )
- Username: lenovo , Password: len0vO
Supermicro IPMI Password Reset - GUI Fuckup did not take password nevertheless changed it
Linux Boot CD
boot grml live


You probably need to load the IPMI kernel modules:

modprobe ipmi_devintf
modprobe ipmi_si

You can add these to /etc/modules to have them loaded automatically (just list the module names):

ipmi_devintf
ipmi_si


ipmitool -I open user set password 2 ADMIN

The number 2 there is the user id. The ADMIN account defaults to user id 2. So I'm setting user id 2's password to ADMIN which is the default, but you could put any other password there.
Windows IPMICFG Tool
- Getestet auf Windows 2019 Server 64Bit
- Passwort für „ADMIN“ auf „ADMIN123!“ setzen:
C:\TMP\IPMICFG_1.31.0_build.200205\IPMICFG_1.31.0_build.200205\Windows\64bit>.\IPMICFG-Win.exe -user setpwd 2 ADMIN123!
Done.

C:\TMP\IPMICFG_1.31.0_build.200205\IPMICFG_1.31.0_build.200205\Windows\64bit>.\IPMICFG-Win.exe -user list
Maximum number of Users          : 10
Count of currently enabled Users : 1
User ID | User Name        | Privilege Level | Enable
------- | ---------        | --------------- | ------
      2 | ADMIN            | Administrator   | Yes

C:\TMP\IPMICFG_1.31.0_build.200205\IPMICFG_1.31.0_build.200205\Windows\64bit>
HP ILO - Upgrade Firmware via Web Access
- Über die Web GUI unter Administration - Firmware → das *.bin File hochladen ( Signature checks usw. werden durch das ILO durchgeführt)
- Bei den Firmware Updates die .scexe Datei runterladen und entpacken
- HP Quote von der Website:
 To obtain firmware image for updating via iLO user interface, utilities, or scripting interface:
Download the SCEXE file to a client running a Linux operating system.  Execute: sh  CP0xxxxx.scexe --unpack=directory
This command will unpack the ilo4_1XX.bin into a user specified "directory". If the directory does not exist, the unpacker will attempt to create it.
Software
nagios signal notifications
- Projekt: https://github.com/AsamK/signal-cli
- Installation auch unter Debian stretch - https://github.com/AsamK/signal-cli/wiki/HowToUbuntu
- Installation liegt unter /opt/signal-cli/
Ubuntu/Debian: sudo apt-get install default-jre

signal-cli -u +436641234567 register
signal-cli -u +436641234567 verify CODE-FROM-SIGNAL-VIA-SMS
signal-cli -u +436641234567 (SENDER) send -m "foo" +438716213 (EMPFÄNGER)

Auth Infos werden unter ~/.local abgelegt d.h. Benutzerenvironment beachten und für nagios kopieren
- Icinga/Nagios Konfiguration
#signal Notification commands

define command {
        command_name    notify-host-by-signal
        command_line    /opt/signal-cli/bin/signal-cli -u +436641234567 send -m '$NOTIFICATIONTYPE$ Host : $HOSTNAME$ is $HOSTSTATE$ @ $LONGDATETIME$' $_CONTACTSIGNAL$
}

define command {
        command_name    notify-service-by-signal
        command_line     /opt/signal-cli/bin/signal-cli -u +436641234567  send  -m '$NOTIFICATIONTYPE$ Host : $HOSTNAME$ - Service : $SERVICEDESC$ is $SERVICESTATE$ @ $LONGDATETIME$' $_CONTACTSIGNAL$
}


#Contact definition

define contact{
        contact_name                    root
        alias                           Root
        service_notification_period     24x7
        host_notification_period        24x7
        service_notification_options    w,u,c,r
        host_notification_options       d,r
        service_notification_commands   notify-service-by-email notify-service-by-signal
        host_notification_commands      notify-host-by-email notify-host-by-signal
        email                           monitoring@pannoniait.at
        _signal                         +436641234567


        }
- Location für shared Secret für Authentifizierung
root@mrMonitoring:/var/lib/nagios# grep nagios /etc/passwd
nagios:x:116:124::/var/lib/nagios:/bin/false
root@mrMonitoring:/var/lib/nagios# ls -al /var/lib/nagios/.local/
total 12
drwx------ 3 nagios nagios 4096 Jul 15 13:08 .
drwxr-xr-x 3 nagios nagios 4096 Jul 15 13:17 ..
drwx------ 3 nagios nagios 4096 Jul 15 13:08 share
root@mrMonitoring:/var/lib/nagios# ls -al /var/lib/nagios/.local/share/
total 12
drwx------ 3 nagios nagios 4096 Jul 15 13:08 .
drwx------ 3 nagios nagios 4096 Jul 15 13:08 ..
drwx------ 3 nagios nagios 4096 Jul 15 13:08 signal-cli
root@mrMonitoring:/var/lib/nagios# ls -al /var/lib/nagios/.local/share/signal-cli/
total 12
drwx------ 3 nagios nagios 4096 Jul 15 13:08 .
drwx------ 3 nagios nagios 4096 Jul 15 13:08 ..
drwx------ 2 nagios nagios 4096 Jul 15 13:08 data
- Neuere Versionen von signal-cli mit Captcha
nagios@mrMonitoring:/opt/signal-cli$ /opt/signal-cli/bin/signal-cli --config /var/lib/nagios/.local/share/signal-cli/data/ -u +43_NUMBER register
Captcha required for verification, use --captcha CAPTCHA
To get the token, go to https://signalcaptchas.org/registration/generate.html
Check the developer tools (F12) console for a failed redirect to signalcaptcha://
Everything after signalcaptcha:// is the captcha token.
nagios@mrMonitoring:/opt/signal-cli$ /opt/signal-cli/bin/signal-cli --config /var/lib/nagios/.local/share/signal-cli/data/ -u +43_NUMBER_SENDER register --captcha "CAPTCHA_INFO_HIER"
nagios@mrMonitoring:/opt/signal-cli$ /opt/signal-cli/bin/signal-cli --config /var/lib/nagios/.local/share/signal-cli/data/ -u +43_NUMBER_SENDER verify NUMBERS_VERIFY_CODE
nagios@mrMonitoring:/opt/signal-cli$ /opt/signal-cli/bin/signal-cli --config /var/lib/nagios/.local/share/signal-cli/data/ -u +43_NUMBER_SENDER send -m "foo" +43_NUMBER_RECIPIENT
65435434


-- https://signalcaptchas.org/registration/generate.html - aus der console bei developer tools den link ablesen fürs captcha
- Certificate Issues / Debian Buster
/opt/signal-cli/bin/signal-cli --config /var/lib/nagios/.local/share/signal-cli/data/ -u +SENDER_NUMBER send  -m 'FOO'  +RECIPIENT_NUMBER
Error while checking account +SENDER_NUMBER: javax.net.ssl.SSLHandshakeException: PKIX path building failed: sun.security.provider.certpath.SunCertPathBuilderException: unable to find valid certification path to requested target
- Danke: https://bugs.freebsd.org/bugzilla/show_bug.cgi?id=266916 / im Wesentlichen whispher.store austauschen in vorhandener lib.jar
Yeah, new workaround works as well:

cd /usr/local/share/signal-cli/lib/
#if exists from previous workaround
rm -r tmp
mkdir tmp
mkdir hund
cd hund
wget https://github.com/AsamK/signal-cli/files/9891234/whisper.store.zip
unzip whisper.store.zip
cd ../tmp
unzip ../lib.jar
mv ../hund/whisper.store org/asamk/signal/manager/config/whisper.store
zip -r ../lib.jar org/ META-INF/
cd ..
rm -r tmp
rm -r hund
nagios performance data
Performance data

Nagios 3 and newer will concatenate the parts following a "|" in a) the first line output by the plugin, and b) in the second to last line, into a string it passes to whatever performance data processing it has configured. (Note that it currently does not insert additional whitespace between both, so the plugin needs to provide some to prevent the last pair of a) and the first of b) getting run together.) Please refer to the Nagios documentation for information on how to configure such processing. However, it is the responsibility of the plugin writer to ensure the performance data is in a "Nagios Plugins" format.

This is the expected format:

'label'=value[UOM];[warn];[crit];[min];[max]

Notes:

    space separated list of label/value pairs
    label can contain any characters except the equals sign or single quote (')
    the single quotes for the label are optional. Required if spaces are in the label
    label length is arbitrary, but ideally the first 19 characters are unique (due to a limitation in RRD). Be aware of a limitation in the amount of data that NRPE returns to Nagios
    to specify a quote character, use two single quotes
    warn, crit, min or max may be null (for example, if the threshold is not defined or min and max do not apply). Trailing unfilled semicolons can be dropped
    min and max are not required if UOM=%
    value, min and max in class [-0-9.]. Must all be the same UOM. value may be a literal "U" instead, this would indicate that the actual value couldn't be determined
    warn and crit are in the range format (see the Section called Threshold and Ranges). Must be the same UOM
    UOM (unit of measurement) is a string of zero or more characters, NOT including numbers, semicolons, or quotes. Some examples:

        no unit specified - assume a number (int or float) of things (eg, users, processes, load averages)
        s - seconds (also us, ms)
        % - percentage
        B - bytes (also KB, MB, TB)
        c - a continous counter (such as bytes transmitted on an interface)

It is up to third party programs to convert the Nagios Plugins performance data into graphs.
nagios custom plugins exit codes
- Achtung Interpreter bei eigenem plugin nicht vergessen e.g. #!/bin/bash sonst u.a. „No output returned bei daemon“ Fehlermeldung
- How To Create Nagios Plugins With Bash On Ubuntu 12.10 (https://www.digitalocean.com/.../tutorials/how-to-create-nagios-plugins-with-bash-on-ubuntu-12-10
Exit Code	Status
0	OK
1       WARNING
2	CRITICAL
3	UNKNOWN
Plugin Output for Nagios

You should always print something to STDOUT that tells if the service is working or why it is failing. Try to keep the output short - probably less that 80 characters. Remember that you ideally would like the entire output to appear in a pager message, which will get chopped off after a certain length.

As Nagios does not capture stderr output, you should only output to STDOUT and not print to STDERR.
Print only one line of text

Starting with version 3, Nagios will process plugins' multi-line output, which should be formatted as:

SERVICE STATUS: First line of output | First part of performance data
Any number of subsequent lines of output, but note that buffers
may have a limited size | Second part of performance data, which
may have continuation lines, too

Note, however, that the default configs still do not include the output's continuation lines into the notifications sent when Nagios notifies contacts about potential problems. Thus, keep your output short and to the point.

Output should be in the format:

SERVICE STATUS: Information text

However, note that this is not a requirement of the API, so you cannot depend on this being an accurate reflection of the status of the service - the status should always be determined by the return code.
Verbose Output

Use the -v flag for verbose output. You should allow multiple-v options for additional verbosity, up to a maximum of 3. The standard type of output should be:

Table 1. Verbose output levels
Verbosity level	Type of output
0	Single line, minimal output. Summary
1	Single line, additional information (eg list processes that fail)
2	Multi line, configuration debug output (eg ps command used)
3	Lots of detail for plugin problem diagnosis
Screen Output

The plugin should print the diagnostic and just the usage part of the help message. A well written plugin would then have --help as a way to get the verbose help.

Code and output should try to respect the 80x25 size of a crt (remember when fixing stuff in the server room!)
Plugin Return Codes

The return codes below are based on the POSIX spec of returning a positive value. Netsaint prior to v0.0.7 supported non-POSIX compliant return code of "-1" for unknown. Nagios supports POSIX return codes by default.

Note: Some plugins will on occasion print on STDOUT that an error occurred and error code is 138 or 255 or some such number. These are usually caused by plugins using system commands and having not enough checks to catch unexpected output. Developers should include a default catch-all for system command output that returns an UNKNOWN return code.

Table 2. Plugin Return Codes
Numeric Value	Service Status	Status Description
0	OK	The plugin was able to check the service and it appeared to be functioning properly
1	Warning	The plugin was able to check the service, but it appeared to be above some "warning" threshold or did not appear to be working properly
2	Critical	The plugin detected that either the service was not running or it was above some "critical" threshold
3	Unknown	Invalid command line arguments were supplied to the plugin or low-level failures internal to the plugin (such as unable to fork, or open a tcp socket) that prevent it from performing the specified operation. Higher-level errors (such as name resolution errors, socket timeouts, etc) are outside of the control of plugins and should generally NOT be reported as UNKNOWN states.
dokuwiki twofactorauth
- Anforderungen: 2 Faktor Authentifizierung mit dokuwiki und google „Authenticator“
- Installation der erforderlichen Plugins (Achtung Abhängigkeiten werden nicht automatisch aufgelöst)


- Plugins aktivieren

- Nach Anmeldung durch User kann die 2 Faktor Authentifizierung aktiviert werden / Mit dem Google Authenticator


- QR Code einscannen und Code eintragen für Aktivierung


- Authentifizierungs Token wird nun benötigt beim Login

- Achtung Grundsätzlich - Uhrzeit muss stimmen auf Endgerät, das die OTP's berechnet
Switches Private VLAN/Port Isolation
- Variante um Layer 2 Angriffe abzumildern ohne VLANs etablieren zu müssen
- Getestet mit HP 1950 - Port Isolation

#global cfg

 port-isolate group 1
 port-isolate group 2


interface GigabitEthernet1/0/1
 port-isolate enable group 1
....
- Geräte innerhalb der gleichen Gruppe können sich gegenseitig nicht erreichen - auch keine MAC Auflösung möglich
- Aber Da alle Geräte innerhalb der gleichen Gruppe einen Uplink (Gateway) teilen ist es möglich den ARP Cache des Gateways zu beeinflussen (getestet mit oldschool arpspoof
 )
) - Sollte zB: arpwatch auf dem Gateway laufen macht sich der Layer 2 Spoof unter einem „FlipFlop“ bemerkbar - d.h. die MAC Adresse zu der IP Adresse ändert sich laufend

Switches STP/RSTP/MSTP/Loopdetect
- Um Loops erkennen zu können reicht oft schon loopback-detection loopback-protection
- Es muss nicht immer STP/RSTP/MSTP sein - dort sollten die Ports zu den Endgeräten als edge ports definiert werden / In erster Linie ist RSTP/STP/MSTP für Redundanz gedacht und nicht als „loop prevention“ / Vor allem bei Setups mit einer großen Anzahl an Access Switches sollten die RSTP/STP/MSTP Paramter angepasst werden wie zB: priority root bridge edge ports - sonst konvergiert die Topologie sehr schlecht bemerkbar durch eine hohe Latenz wenn zB: eine Lease gezogen wird von einem Endgerät kurz nachdem das Interface up geht
- loopback-detect bei Comware/HPE Switches:
- zB: zuerst global aktivieren und dann auf einer Interface range von 1 bis 48 / interface blockieren und kein shutdown - shutdown muss manuell terminiert werden d.h. undo vom shutdown damit da interface wieder hochkommt
<switch05>xtd-cli-mode
All commands can be displayed and executed in extended CLI mode. Switch to extended CLI mode? [Y/N]:y
Password:
Warning: Extended CLI mode is intended for developers to test the system. Before using commands in extended CLI mode, contact the Technical Support and make sure you know the potential impact on the device and the network.


<switch05>system-view

[switch05]loopback-detection global enable vlan all

[switch05]interface range g1/0/1 to g1/0/48
[switch05-if-range]loopback-detection enable vlan all
[switch05-if-range]loopback-detection action block

[switch05-if-range]exit
[switch05]write changed

<switch05>display loopback-detection
Loopback detection is enabled.
Loopback detection interval is 30 second(s).
No loopback is detected.
- Im logging zB: per syslog erhält man folgende Einträge
Feb  1 06:47:47 IP %%10LPDT/4/LPDT_VLAN_LOOPED: Loopback exists on GigabitEthernet1/0/43 in VLAN 1.
Feb  1 06:47:47 IP %%10LPDT/4/LPDT_LOOPED: Loopback exists on GigabitEthernet1/0/41.
Feb  1 06:47:47 IP %%10LPDT/4/LPDT_VLAN_LOOPED: Loopback exists on GigabitEthernet1/0/41 in VLAN 1.
Feb  1 06:49:09 IP %%10LPDT/5/LPDT_VLAN_RECOVERED: Loopback on Ten-GigabitEthernet1/0/49 in VLAN 1 recovered.
Feb  1 06:49:09 IP %%10LPDT/5/LPDT_RECOVERED: Loopback on Ten-GigabitEthernet1/0/49 recovered.
Feb  1 06:49:09 IP %%10LPDT/5/LPDT_VLAN_RECOVERED: Loopback on Ten-GigabitEthernet1/0/52 in VLAN 1 recovered.
Thunderbird
- User Agent aus Mails entfernen / general.useragent.override leerer String


- Outlook 365 + Thunderbird
- wenn es nicht möglich ist und deaktiviert wurde per SMTP über die Microsoft Server Mails zu verschicken
- Extension: ExQuilla u. MFA
- Getestet unter: Debian 12 mit Thunderbird 102.13.0 (64bit) und der Version 115.2 der Extension.


dokuwiki
- Darstellungsfehler nach Installation von Extension für Upgrades
- Aufgetreten auf: Ubuntu 18.04 / dokuwiki Upgrade von Version von 2015 auf 2020
root@doku:~# cat dokuwiki_css_errors
vim /var/www/doku/lib/exe/css.php +174
->     $less->importDir=array();
 array() definition before

sortablejs errors
root@doku:/var/www/doku/lib/plugins# rm -rf sortablejs/
Teams
- Achtung wenn es beim Erstellen einer Gruppe nicht möglich ist den Typ des Teams anzugeben wurde der falsche Lizenztyp definiert - im Bundesschulumfeld muss es A1 oder A3 „Lehrerlizenz“ sein / Die Umstellung der Lizenz bzw. der damit verbundene Effekt kann bis zu 24 Stunden dauern

ntopng
- Die Datenbank konsumiert langsam den ganzen Speicher (/var/lib/ntopng/)
- Interface raussuchen → settings → manage data / Nach einem Neustart der Software wird der Speicher freigegeben

Netzburgenland - Smartmeter
- Nach dem Wechsel des Stromanbieters war auch ein neuer Vetrag mit der Netzburgenland fällig und auch eine neue Kundennummer / Mit der alten Kundennummer ist ein Login weiterhin möglich nur liefert https://smartmeter.netzbugenland.at die historischen Werte nicht mehr aus - sie sind verloren
- Läuft nun als Cron Job auf einem Linux Server (daily) / Hier gibt es eine Vielzahl an Verbesserungsmöglichkeiten but it gets the shit done
- Update Offenbar werden nicht jeden Tag die Werte geliefert / in der aktuellen Version zu jedem beliebigen Zeitpunkt ausführbar und wenn die ermittelten Werte noch nicht vorhanden sind werden sie hinzugefügt zum aktuellen Jahr
- Update OpenID Login funktioniert nicht mehr / Gegenwärtig werden die Seiten aus reinem Java-Script Code generiert - JavaScript Interpreter wird benötigt
- auth-smartmeter-netzburgenland.sh PATH_TO_CSV_FILE.csv
#!/bin/bash
USERNAME="123456"
PASSWORD="PASSWORD"
SMARTMETER_ID="AT0000000000000000000000000012345"
#REFERENCE_HEADING="Start;Ende;Verbrauch (kWh) - Hochtarif;Zählerstand (kWh) - Hochtarif;Verbrauch (kWh) - Hochtarif (Ersatzwerte);Zählerstand (kWh) - Hochtarif (Ersatzwerte)"
REFERENCE_HEADING="Start;Ende;Verbrauch (kWh) - 1.8.1;Zählerstand (kWh) - 1.8.1;Verbrauch (kWh) - 1.8.1 (Ersatzwerte);Zählerstand (kWh) - 1.8.1 (Ersatzwerte)"
WEBSITE_CONTENT=$(mktemp) || bailout "Couldn't create tmp file"
FIRST_COOKIES=$(mktemp) || bailout "Couldn't create tmp file"
SECOND_COOKIES=$(mktemp) || bailout "Couldn't create tmp file"
WEBSITE_LOGIN_RESPONSE=$(mktemp) || bailout "Couldn't create tmp file"
CSV_CONTENT_RESPONSE=$(mktemp) || bailout "Couldn't create tmp file"
function cleanup
{
[[ -f $WEBSITE_CONTENT ]] && rm $WEBSITE_CONTENT
[[ -f $FIRST_COOKIES ]] && rm $FIRST_COOKIES
[[ -f $SECOND_COOKIES ]] && rm $SECOND_COOKIES
[[ -f $WEBSITE_LOGIN_RESPONSE ]] && rm $WEBSITE_LOGIN_RESPONSE
[[ -f $CSV_CONTENT_RESPONSE ]] && rm $CSV_CONTENT_RESPONSE
}
function bailout
{
echo -e "$1" >&2
echo -e "\nUsage: $0 FILE_APPEND_VALUES_IF_SUCCESS" >&2
cleanup
exit 2
}
which wget >/dev/null || bailout "wget not found - check environment , please install"
which head > /dev/null || bailout "head not found - check environment , please install"
which iconv > /dev/null || bailout "iconv not found - check environment , please install"
which tail > /dev/null || bailout "tail not found - check environment , please install"
[[ "$#" != 1 ]] && bailout "Argument Count not valid !"
TARGET_FILE="$1"
if [[ ! -f "$TARGET_FILE" ]]
then
echo $REFERENCE_HEADING > "$TARGET_FILE" || bailout "Cannot write CSV Heading to file $TARGET_FILE"
else
head -n 1 "$TARGET_FILE" | grep --fixed-strings -q "$REFERENCE_HEADING"
[[ $? != "0" ]] && bailout "REFERENCE HEADING: $REFERENCE_HEADING IS WRONG in CURRENT FILE: $TARGET_FILE"
fi
wget --timeout=90 --tries=1 -q -O $WEBSITE_CONTENT https://smartmeter.netzburgenland.at/enView.Portal --save-cookies $FIRST_COOKIES --keep-session-cookies || bailout "Couldn't execute wget query"
URL_POST=$(grep -o "https://login.netzburgenland.at:8453/.*\" " $WEBSITE_CONTENT | tr -d "\"")
# 2022-11-16 cc: Bash Like Syntax for removing all occurences
# ${parameter//pattern/string}
URL_POST=${URL_POST//\&\;/\&}
URL_POST=${URL_POST/" "/}
POST_PARAMS=$(echo $URL_POST | grep -o "?.*" )
POST_PARAMS=${POST_PARAMS/" "//}
POST_PARAMS=${POST_PARAMS/\?/}
wget --timeout=90 --tries=1 -q -O $WEBSITE_LOGIN_RESPONSE --post-data "username=$USERNAME&password=$PASSWORD&$POST_PARAMS" "$URL_POST" --load-cookies $FIRST_COOKIES --save-cookies $SECOND_COOKIES --keep-session-cookies || bailout "Couldn't establish valid session"
#2022-11-16 cc: choose your time frame
#2022-11-19 cc: Always get all values beginning from current year up till now
CURRENT_DATE=$(date -I)
PREVIOUS_DATE=$(date +%Y)
FETCH_URL="https://smartmeter.netzburgenland.at/enView.Portal/api/consumption/month?start=$PREVIOUS_DATE""-01-01T00:00:00.00Z&end=$CURRENT_DATE""T00:00:00.00Z&meteringPointIdentifier=$SMARTMETER_ID&format=csv"
wget -q --timeout=90 --tries=1 -O $CSV_CONTENT_RESPONSE $FETCH_URL --load-cookies $SECOND_COOKIES || bailout "Couldn't fetch CSV values from $previous_date to $current_date"
iconv -f ISO-8859-1 -t UTF-8//TRANSLIT $CSV_CONTENT_RESPONSE -o $CSV_CONTENT_RESPONSE || bailout "Couldn't convert CSV Content response from ISO to UTF-8 Format"
head -n 1 $CSV_CONTENT_RESPONSE | grep --fixed-strings -q "$REFERENCE_HEADING"
[[ $? != "0" ]] && bailout "REFERENCE HEADING IS WRONG: $REFERENCE_HEADING"
while read line ;
do
KWH_VALUE=$(echo $line | cut -d";" -f 3);
METER_COUNTER=$(echo $line | cut -d";" -f 4);
if [[ -n "$KWH_VALUE" && -n "$METER_COUNTER" ]]
then
grep -q --fixed-strings "$line" "$TARGET_FILE"
if [[ $? != "0" ]]
then
#2022-11-19 : in the original format there's a leading whitespace
echo " $line" >> "$TARGET_FILE"
fi
fi
done < <( tail -n +2 $CSV_CONTENT_RESPONSE )
cleanup
exit 0
- Nachdem die Werte nun gespeichert werden möchte ich auch zB: monatlich eine grafische Statistik bekommen / im folgenden Beispiel befinden sich in der CSV Datei die Einträge für 1.10 bis 31.10 / gnuplot von Datei: 2022-10.csv , Ausgabe: power-usage-2022-10.png
#2022-11-17 cc: thanks https://stackoverflow.com/questions/13785832/month-tics-how-to-set , https://raymii.org/s/tutorials/GNUplot_tips_for_nice_looking_charts_from_a_CSV_file.html#toc_0

set datafile separator ';'

set xdata time # tells gnuplot the x axis is time data
set timefmt "%d.%m.%Y" # specify our time string format
set format x "%d.%m" # otherwise it will show only MM:SS

set key autotitle columnhead
set ylabel "kw/h per day"
set xlabel "Date 2022"


set style line 100 lt 1 lc rgb "grey" lw 1.5 # linestyle for the grid
set ytics 0.5
#The difference of seconds between one entry to the next 1 day
set xtics 86400
#set xtics 3600
set grid ls 100

set y2tics # enable second axis
set ytics nomirror # dont show the tics on that side
set y2label "Zaehlerstand" # label for second axis

set style line 101 lw 0.5 lt rgb "#ff0000"
set style line 102 lw 0.5 lt rgb "#0000ff"

set terminal pngcairo size 1920,1080 enhanced font 'Segoe UI,10'
set output 'power-usage-2022-10.png'

#original format
plot "2022-10.csv" using 1:3 with lines ls 101,'' using 1:4 with lines ls 102 axis x1y2
- power-usage-2022-10.png
- Achtung Interpretation der Kurven / jeder Tag betrifft den Zeitraum von 01:00 bis 01:00 am „nächsten“ Tag

I-NET Provider Netzsperren
- Aufgrund eines interessanten Falls / Manche Provider scheinen für Privatkunden bereits seit längerer Zeit TCP/25 zu Sperren - zur Spamabwehr - Im RTR Netzneutralitätsbericht werden solche Fälle beschrieben
| Internet Provider | Sperre | Anmerkungen |
|---|---|---|
| Drei Mobilfunk - Smartphone Tarif | TCP/25 ausgehend | Port 587 für Submission wird erlaubt d.h. „Client Authentifizierung“ zum Versand |
| Magenta Mobilfunk - Smartphone Tarif | - | keine Sperre bei TCP/25 |
Hardware
QNAP QNA-UC5G1T USB 3.0 auf 5GbE Adapter
- Getestet in Kombination mit XGS1210-12 und 10Gbit DAC Kabel von 10Gtek und RJ45 10Gbit SFP+ Modul von 10Gtek - Richtung vom USB3 Adapter Push Richtung Server der per DAC Kabel angehängt wurde
^Croot@mrChief:/home/urnilxfgbez# iperf -c 192.168.1.138 -t 600 -i 60
------------------------------------------------------------
Client connecting to 192.168.1.138, TCP port 5001
TCP window size: 85.0 KByte (default)
------------------------------------------------------------
[  3] local 192.168.1.20 port 41928 connected with 192.168.1.138 port 5001
[ ID] Interval       Transfer     Bandwidth
[  3] 0.0000-60.0000 sec  22.4 GBytes  3.21 Gbits/sec
[  3] 60.0000-120.0000 sec  22.4 GBytes  3.21 Gbits/sec
[  3] 120.0000-180.0000 sec  22.4 GBytes  3.20 Gbits/sec
[  3] 180.0000-240.0000 sec  22.4 GBytes  3.21 Gbits/sec
[  3] 240.0000-300.0000 sec  22.4 GBytes  3.20 Gbits/sec
[  3] 300.0000-360.0000 sec  22.4 GBytes  3.21 Gbits/sec
[  3] 360.0000-420.0000 sec  22.4 GBytes  3.20 Gbits/sec
[  3] 420.0000-480.0000 sec  22.5 GBytes  3.23 Gbits/sec
[  3] 480.0000-540.0000 sec  22.7 GBytes  3.26 Gbits/sec
[  3] 540.0000-600.0000 sec  22.7 GBytes  3.25 Gbits/sec
[  3] 600.0000-600.0034 sec   256 KBytes   615 Mbits/sec
[  3] 0.0000-600.0034 sec   225 GBytes  3.22 Gbits/sec
- Andere Richtung push vom Server der per DAC Kabel am Zyxel hängt auf den Adapter - sehr bescheiden

root@mrChief:/home/urnilxfgbez# iperf -s
------------------------------------------------------------
Server listening on TCP port 5001
TCP window size:  128 KByte (default)
------------------------------------------------------------
[  4] local 192.168.1.20 port 5001 connected with 192.168.1.138 port 47624
[ ID] Interval       Transfer     Bandwidth
[  4] 0.0000-542.6689 sec  54.7 GBytes   866 Mbits/sec
Zyxel XGS1210-12
- Default Passwort: 1234 u. DHCP
- 2x SFP+ 10Gbit / 2x RJ45 2.5G
- Firmware Download: https://www.zyxel.com/de/de/support/download?model=xgs1210-12
- DAC Kabel , das funktioniert: 10Gtek für Intel XDACBL3M SFP+ Kabel 3-Meter , https://www.amazon.de/-/en/gp/product/B01DCZCD3G/ref=ppx_yo_dt_b_search_asin_image?ie=UTF8&psc=1
- SFP+ Modul auf RJ45 , das funktioniert: 10Gtek HPP, HP Aruba Compatible 10G SFP+ to RJ45 Module, 10GBase-T Copper Transceiver, up to 30 Metres - https://www.amazon.de/-/en/gp/product/B08GQX79LQ/ref=ppx_yo_dt_b_search_asin_title?ie=UTF8&th=1
- Achtung bei Test wurde ein USB3 (von QNAP) Adapter auf RJ45 (5Gbit Full Duplex) angeschlossen - auf der anderen Seite sieht der Switch 10Gbit vom 10Gtek SFP+ Modul auf RJ45 - falsche Information

Banana Pi BPI-R3
- / SFP Module für 2.5Gbit
- Snapshot Build zum Testen: https://firmware-selector.openwrt.org/?version=SNAPSHOT&target=mediatek%2Ffilogic&id=bananapi_bpi-r3 für SD Karte ↔ dd auf SD und Go :)
- Infos openwrt: https://openwrt.org/toh/sinovoip/bananapi_bpi-r3
- Offizielles Hersteller: https://wiki.banana-pi.org/Banana_Pi_BPI-R3
- Jumper Settings von Herstellerseite:

- Installation von SD auf NAND Speicher (https://openwrt.org/toh/sinovoip/bananapi_bpi-r3#installation) / reboot :
To instruct the bootloader to install to SPI-NAND (A=1, B=1, C=1, D=1):

root@OpenWrt:/# fw_setenv bootcmd "env default bootcmd ; saveenv ; run ubi_init ; bootmenu 0"
- Antennen Montage:

- Snapshot OpenWRT Image mit verbundenem Pixel 7 , Entfernung 20cm
root@OpenWrt:~# iw phy1-ap0 station dump
Station foo(on phy1-ap0)
	inactive time:	0 ms
	rx bytes:	5277012377
	rx packets:	3487455
	tx bytes:	28816729
	tx packets:	436536
	tx retries:	3060
	tx failed:	3060
	rx drop misc:	3
	signal:  	-45 [-56, -47, -51, -51] dBm
	signal avg:	-45 [-56, -47, -51, -51] dBm
	tx bitrate:	1200.9 MBit/s 80MHz HE-MCS 11 HE-NSS 2 HE-GI 0 HE-DCM 0
	tx duration:	4675820 us
	rx bitrate:	1200.9 MBit/s 80MHz HE-MCS 11 HE-NSS 2 HE-GI 0 HE-DCM 0
	rx duration:	38579461 us
	last ack signal:-42 dBm
	avg ack signal:	-41 dBm
	airtime weight: 256
	authorized:	yes
	authenticated:	yes
	associated:	yes
	preamble:	long
	WMM/WME:	yes
	MFP:		yes
	TDLS peer:	no
	DTIM period:	2
	beacon interval:100
	short slot time:yes
	connected time:	135 seconds
	associated at [boottime]:	208.409s
	associated at:	1709504237926 ms
	current time:	1709504373380 ms
- Verschlüsselung sae (WPA3) - Pixel 7 Push direkt auf Gerät (iperf -s) mit iperf aus Google Playstore / Pixel zeigt 1200Mbit in beide Richtungen Brutto
[ ID] Interval       Transfer     Bandwidth
[  3] 0.0000-120.0001 sec  11.6 GBytes   828 Mbits/sec
NiPoGi Mini PC Alder Lake N100
- Um 200€ bei Amazon , Ziel ist ein stromsparendes System zu kaufen: https://www.amazon.de/dp/B0CLCZBVTQ?psc=1&ref=ppx_yo2ov_dt_b_product_details
- Getestet mit: Linux Mint 21 - 6.5er Kernel (hwe) / 4k Auflösung über HDMI ok :)
- Achtung Ton über HDMI noch Baustelle / Audio über 3.5mm klinke möglich ?
- Stromverbrauch, liegt zwischen 16 und unter Last (yes > /dev/null auf alle 4 Kerne) bei 23 Watt

Synology DS1513+
- Austausch einer defekten Platte ,identifiziert als Datenträger 4 / Hotplug bzw. Hotswap wird unterstützt / Achtung bei RAID5 kann nur eine Platte ausfallen
- Bei legacy Platten dieser Größe zB: 4TB immer RAID6 wenn möglich erstellen d.h. 2 Festplatten könnten ausfallen
- Die Synology kann auch herunter gefahren werden (länger drücken auf power) um die Festplatte offline zu identifizieren


Banana Pi BPI-R3 Mini
- Per Default SSH Server aktiv ohne Passwort - 192.168.1.1 - DHCP Server aktiv
- Infos hinsichtlich Hardware und verfügbare Images: https://wiki.banana-pi.org/Banana_Pi_BPI-R3_Mini
- Achtung Aktuell sind noch keine offiziellen OpenWRT Images für dieses Board vorhanden
- Infos zum Flashen der Firmware: https://wiki.banana-pi.org/Getting_Started_with_BPI-R3_MINI - Entweder von NAND oder EMMC Speicher booten um das jeweils andere System upzugraden
- EMMC OpenSource Image mit Kernel Modulproblemen ! NAND OpenSource Image von November 2023 hat funktioniert lässt sich jedoch nicht mehr Updaten oder zusätzliche Pakete installieren - FAIL - warten auf offizielle OpenWRT Unterstützung
- USB-C Anschluss kann auch als serieller Zugang genutzt werden - screen /dev/ttyUSB0 115200 :)
- Performance mit Google Pixel 7 ↔ BPI ↔ iperf Server Gbit verkabelt - bei bis zu 800Mbit in die eine und andere Richtung (Google Playstore - iperf App)
- Größenvergleich:

- Vom EMMC System aus NAND flashen laut Website quote / *.bin Firmware kann einfach ins /tmp hochgeladen werden über ssh
    * mtd erase /dev/mtd0
    * dd if=mtk-bpi-r3mini-NAND-20230719-single-image.bin of=/dev/mtdblock0
- Vom NAND System aus EMMC flashen laut Website quote / Achtung hatte hier Kernel Modul Ladeprobleme
---
root@OpenWrt:/tmp# echo 0 > /sys/block/mmcblk0boot0/force_ro
root@OpenWrt:/tmp#  dd if=bl2_emmc-r3mini.img of=/dev/mmcblk0boot0
390+1 records in
390+1 records out
root@OpenWrt:/tmp# dd if=mtk-bpi-r3mini-mac80211-EMMC-20231115-single-image.bin
of=/dev/mmcblk0
136257+1 records in
136257+1 records out
root@OpenWrt:/tmp# mmc bootpart enable 1 1 /dev/mmcblk0

poweroff  & pin wieder auf emmc setzen um davon zu booten
----
Migration 1TB NVME to 2TB NVME
- HP 440 G7 - Achtung M.2 Schraube durchgeiert , magisches Zangerl hinsichtlich Grip: https://www.amazon.de/-/en/dp/B001D7KU7W?psc=1&ref=ppx_yo2ov_dt_b_product_details

- Start von grml - neue Samsung NVME hängt per USB3 Adapter
- dd if=/dev/alt of=/dev/neu bs=20M oflag=sync
- Partition table neu einlesen ggf. reboot / partprobe /dev/neu → alte NVME entfernen neue einbauen u. wieder von grml per USB Stick starten
- parted /dev/neu → unit s → print free → resizepart nummer sektorens

- Cryptsetup Partition zeigt nun richtige neue größe an / Cryptsetup anpassen
- crypsetup luksOpen /dev/neup3 root / cryptsetup resize root / e2fsck -f /dev/mapper/root / resize2fs /dev/mapper/root (ext4)

- Online Resize
(parted) print
Model: ATA Samsung SSD 870 (scsi)
Disk /dev/sda: 2000GB
Sector size (logical/physical): 512B/512B
Partition Table: gpt
Disk Flags:

Number  Start   End     Size    File system  Name                  Flags
 1      1049kB  630MB   629MB   fat32        EFI system partition boot, esp
 2      630MB   1704MB  1074MB  ext4         Linux filesystem
 3      1704MB  1000GB  999GB                Linux filesystem

(parted) resizepart 3 2000GB
(parted) print
Model: ATA Samsung SSD 870 (scsi)
Disk /dev/sda: 2000GB
Sector size (logical/physical): 512B/512B
Partition Table: gpt
Disk Flags:

Number  Start   End     Size    File system  Name                  Flags
 1      1049kB  630MB   629MB   fat32        EFI system partition boot, esp
 2      630MB   1704MB  1074MB  ext4         Linux filesystem
 3      1704MB  2000GB  1998GB               Linux filesystem


-------


root@mrChief:/home/urnilxfgbez# lsblk
NAME         MAJ:MIN RM   SIZE RO TYPE  MOUNTPOINT
sda            8:0    0   1.8T  0 disk
├─sda1         8:1    0   600M  0 part  /boot/efi
├─sda2         8:2    0     1G  0 part  /boot
└─sda3         8:3    0   1.8T  0 part
  └─ROOTIGES 253:0    0 929.9G  0 crypt /
root@mrChief:/home/urnilxfgbez# cryptsetup resize ROOTIGES
Enter passphrase for /dev/sda3:
root@mrChief:/home/urnilxfgbez# echo $?
0
root@mrChief:/home/urnilxfgbez# lsblk
NAME         MAJ:MIN RM  SIZE RO TYPE  MOUNTPOINT
sda            8:0    0  1.8T  0 disk
├─sda1         8:1    0  600M  0 part  /boot/efi
├─sda2         8:2    0    1G  0 part  /boot
└─sda3         8:3    0  1.8T  0 part
  └─ROOTIGES 253:0    0  1.8T  0 crypt /

  ----
  root@mrChief:/home/urnilxfgbez# resize2fs /dev/mapper/ROOTIGES
resize2fs 1.46.2 (28-Feb-2021)
Filesystem at /dev/mapper/ROOTIGES is mounted on /; on-line resizing required
old_desc_blocks = 117, new_desc_blocks = 233
The filesystem on /dev/mapper/ROOTIGES is now 487861154 (4k) blocks long.

root@mrChief:/home/urnilxfgbez#
Dacia
- Sandero u. Logan MCV Kombi Baujahr 2019
- Im Handbuch wird der Lampentyp genau beschrieben - H7 Austauschlampe zB: https://www.amazon.de/-/en/gp/product/B092JMZTDR
- Achtung Staubschutz vorher sanft entfernen damit „Gummideckel“ nicht im Motorraum verschwindet / Beim Entfernen der Lampe mit Gefühl vorgehen :)

FritzBox 6490
- Für Monitoring der uptime und der interface Auslastung
- Anmerkungen Es muss einen watchdog geben der bei erhöhter Auslastung oder einem bestimmten Limit der Conntrack Table einen Reboot durchführt - festgestellt bei ~300 Geräten dahinter :)
- Getestet auf Ubuntu 18.04 + Icinga + check_nwc_health
Download von https://labs.consol.de/assets/downloads/nagios/ bei git fehlte ./configure

ubuntu 18.04 - Dependencies
 apt-get install libfile-slurp-perl libjson-perl libsoap-lite-perl libxml-libxml-lazybuilder-perl libsnmp-session-perl libjson-xs-perl

nagios - Command definition:

define command {
command_name check_fritzbox
command_line $USER1$/check_nwc_health --timeout 25 -H $HOSTADDRESS$ --port 49000 --mode $ARG1$

}

nagios - Service Definition:

define service {
        use     generic-service
        host_name       fritzbox
        service_description UPTIME
        check_command   check_fritzbox!uptime
}

define service {
        use     generic-service
        host_name       fritzbox
        service_description INTERFACE_USAGE
        check_command   check_fritzbox!interface-usage

}

nagios - Host Definition:

define host{
        use             generic-host
        host_name       fritzbox
        alias           fritzbox
        address         1.2.3.4
}
- Achtung bei unbestimmbaren parse Errors könnte es sich um ein Firewalling Problem handeln (e.g. return Code 403)
Brennenstuhl Premium-Web-Line V3
- IP Steckdoseleiste um den Verbrauch zu messen und ab ins Monitoring mit den Werten :)
- Für APC USV's gibt es ein Management Modul , das kostet jedoch wesentlich mehr als die Steckdosenleiste
- Default DHCP , Username: admin , Passwort: admin
- Interessante Erkenntnis / die USV zieht natürlich mehr Strom als sie am Display anzeigt wenn sie den Strom von der IP Steckdose bezieht und dort gemessen wird
- Welcome to Bugland
- E-Mail Versand funktioniert nicht (probiert ohne SMTP Auth / ausschließlich mit Serverkonfiguration und am Postfix wurde die IP zu den trusted my networks hinzufgefügt)
- Stromverbrauch wird überhaupt nur vom ersten Stromkreis (1) gemessen , der 2. kann nur ein / ausgeschalten werden aber es wird nicht der Verbrauch angezeigt / ok steht in Beschreibung ..
- Stromverbrauch auf eine/zwei „Kommastellen“ genau d.h. Wert *0.1 = Watt / Community String muss public sein sonst funktionierts nicht
/usr/lib/nagios/plugins/check_snmp -H IP -C public -o iso.3.6.1.4.1.40595.1.2.1.0 -u watt -l centiwatt -w :2000 -c :4000
SNMP OK - centiwatt 1688 watt | centiwatt=1688;:2000;:4000
- Hoffentlich stimmt der Stromverbrauch, dafür wurde sie eigentlich gekauft :)
- ACHTUNG Vorsicht bei Firmware Update - es besteht die Möglichkeit sie unbrauchbar zu machen wenn zB: ein Fehler auftritt beim Upload der Firmware - er zieht nur mehr per DHCP eine Lease ohne verfügbare Dienste und die Schuko Dosen funktionieren nicht mehr - da sie über die Firmware gesteuert werden - FAIL

- Monitoring:

Dell - R710
- Dist-Upgrade in Place von 2012r2 auf 2019 ist möglich , getestet über RDP , Server dient ausschließlich als Hyper-V Host und Urbackup läuft darauf
- Achtung nach Upgrade gibt es keine Netzwerkverbindung , offenbar gibt es hier einen Bug betreffend der Netzwerkkarten in Kombination mit Hyper-V , alle virtuellen Switches werden auf „Privat“ gesetzt . Nach Deinstallation der Netzwerkkarten und manueller Neukonfiguration flutscht es wieder
- Beim Versuch auf 2016 upzugraden hing er bei 31% und machte schlussendlich einen rollback
- Battery Pack für den Perc6i ist end of life, keine Möglichkeit mehr über Dell offiziell zu kaufen (BBG) - https://www.amazon.de/gp/product/B075CK1F2N/ref=ppx_yo_dt_b_asin_title_o00_s00?ie=UTF8&psc=1 läuft so weit
- Original Dell Battery Pack:

- Nachbau Amazon:

- Infos der Raid Controller Software:

Eaton Ellipse - USV - ECO 650 - USB
- Sehr kompakt - passt auch in kleine Netzwerkschränke (https://www.amazon.de/gp/product/B0054WJ244/ref=ppx_yo_dt_b_search_asin_title?ie=UTF8&th=1)
- Überwachung auf debian buster mit nut (apt-get install nut)
root@master:~# grep -v ^# /etc/nut/nut.conf

MODE=standalone

-----


root@master:~# grep -v ^# /etc/nut/upsd.conf


LISTEN 127.0.0.1 3493
------

root@master:~# lsusb  | grep MGE
Bus 001 Device 003: ID 0463:ffff MGE UPS Systems UPS


root@master:~# grep -v ^# /etc/nut/ups.conf


maxretry = 3

[eaton]
driver = usbhid-ups
port = auto
vendorid = 0463

-----

root@master:~# grep -v ^# /etc/nut/upsd.users


[upsmonitor]
password = PASSWORD
upsmon master

------

root@master:~# grep -v ^# /etc/nut/upsmon.conf


MONITOR eaton@localhost 1 upsmonitor PASSWORD master


MINSUPPLIES 1


SHUTDOWNCMD "/sbin/shutdown -h +0"


POLLFREQ 5


POLLFREQALERT 5


HOSTSYNC 15


DEADTIME 15


POWERDOWNFLAG /etc/killpower


RBWARNTIME 43200


NOCOMMWARNTIME 300


FINALDELAY 5

-----

root@master:~# systemctl status nut-monitor
● nut-monitor.service - Network UPS Tools - power device monitor and shutdown controller
   Loaded: loaded (/lib/systemd/system/nut-monitor.service; enabled; vendor preset: enabled)
   Active: active (running) since Wed 2022-04-20 08:27:06 CEST; 5min ago
  Process: 44056 ExecStart=/sbin/upsmon (code=exited, status=0/SUCCESS)
 Main PID: 44058 (upsmon)
    Tasks: 2 (limit: 9479)
   Memory: 1.1M
   CGroup: /system.slice/nut-monitor.service
           ├─44057 /lib/nut/upsmon
           └─44058 /lib/nut/upsmon

Apr 20 08:27:06 master systemd[1]: Starting Network UPS Tools - power device monitor and shutdown controller...
Apr 20 08:27:06 master upsmon[44056]: fopen /var/run/nut/upsmon.pid: No such file or directory
Apr 20 08:27:06 master upsmon[44056]: UPS: eaton@localhost (master) (power value 1)
Apr 20 08:27:06 master upsmon[44056]: Using power down flag file /etc/killpower
Apr 20 08:27:06 master systemd[1]: nut-monitor.service: Can't open PID file /run/nut/upsmon.pid (yet?) after start: No such file or directory
Apr 20 08:27:06 master upsmon[44057]: Startup successful
Apr 20 08:27:06 master systemd[1]: nut-monitor.service: Supervising process 44058 which is not our child. We'll most likely not notice when it exits.
Apr 20 08:27:06 master upsmon[44058]: Init SSL without certificate database
Apr 20 08:27:06 master systemd[1]: Started Network UPS Tools - power device monitor and shutdown controller.

--------------

root@master:~# systemctl status nut-server
● nut-server.service - Network UPS Tools - power devices information server
   Loaded: loaded (/lib/systemd/system/nut-server.service; enabled; vendor preset: enabled)
   Active: active (running) since Wed 2022-04-20 08:25:27 CEST; 7min ago
  Process: 44017 ExecStart=/sbin/upsd (code=exited, status=0/SUCCESS)
 Main PID: 44018 (upsd)
    Tasks: 1 (limit: 9479)
   Memory: 784.0K
   CGroup: /system.slice/nut-server.service
           └─44018 /lib/nut/upsd

Apr 20 08:25:27 master systemd[1]: Starting Network UPS Tools - power devices information server...
Apr 20 08:25:27 master upsd[44017]: fopen /var/run/nut/upsd.pid: No such file or directory
Apr 20 08:25:27 master upsd[44017]: listening on 127.0.0.1 port 3493
Apr 20 08:25:27 master upsd[44017]: listening on 127.0.0.1 port 3493
Apr 20 08:25:27 master upsd[44017]: Connected to UPS [eaton]: usbhid-ups-eaton
Apr 20 08:25:27 master upsd[44017]: Connected to UPS [eaton]: usbhid-ups-eaton
Apr 20 08:25:27 master upsd[44018]: Startup successful
Apr 20 08:25:27 master systemd[1]: Started Network UPS Tools - power devices information server.
Apr 20 08:27:06 master upsd[44018]: User upsmonitor@127.0.0.1 logged into UPS [eaton]


-------

root@master:~# systemctl status nut-driver
● nut-driver.service - Network UPS Tools - power device driver controller
   Loaded: loaded (/lib/systemd/system/nut-driver.service; static; vendor preset: enabled)
   Active: active (running) since Wed 2022-04-20 08:25:27 CEST; 7min ago
  Process: 44013 ExecStart=/sbin/upsdrvctl start (code=exited, status=0/SUCCESS)
 Main PID: 44016 (usbhid-ups)
    Tasks: 1 (limit: 9479)
   Memory: 1004.0K
   CGroup: /system.slice/nut-driver.service
           └─44016 /lib/nut/usbhid-ups -a eaton

Apr 20 08:25:20 master systemd[1]: Starting Network UPS Tools - power device driver controller...
Apr 20 08:25:25 master upsdrvctl[44013]: Using subdriver: MGE HID 1.39
Apr 20 08:25:25 master upsdrvctl[44013]: Network UPS Tools - Generic HID driver 0.41 (2.7.4)
Apr 20 08:25:25 master upsdrvctl[44013]: USB communication driver 0.33
Apr 20 08:25:27 master upsdrvctl[44013]: Network UPS Tools - UPS driver controller 2.7.4
Apr 20 08:25:27 master systemd[1]: Started Network UPS Tools - power device driver controller.
Apr 20 08:25:27 master usbhid-ups[44016]: Startup successful


-----

UPS Communication Debugging:

root@master:~# upsc eaton
Init SSL without certificate database
battery.charge: 100
battery.charge.low: 20
battery.runtime: 1875
battery.type: PbAc
device.mfr: EATON
device.model: Ellipse ECO 650
device.serial: 000000000
device.type: ups
driver.name: usbhid-ups
driver.parameter.pollfreq: 30
driver.parameter.pollinterval: 2
driver.parameter.port: auto
driver.parameter.synchronous: no
driver.parameter.vendorid: 0463
driver.version: 2.7.4
driver.version.data: MGE HID 1.39
driver.version.internal: 0.41
input.transfer.high: 264
input.transfer.low: 184
outlet.1.desc: PowerShare Outlet 1
outlet.1.id: 2
outlet.1.status: on
outlet.1.switchable: no
outlet.2.desc: PowerShare Outlet 2
outlet.2.id: 3
outlet.2.status: on
outlet.2.switchable: no
outlet.desc: Main Outlet
outlet.id: 1
outlet.power: 25
outlet.switchable: no
output.frequency.nominal: 50
output.voltage: 230.0
output.voltage.nominal: 230
ups.beeper.status: enabled
ups.delay.shutdown: 20
ups.delay.start: 30
ups.firmware: 02
ups.load: 13
ups.mfr: EATON
ups.model: Ellipse ECO 650
ups.power.nominal: 650
ups.productid: ffff
ups.serial: 000000000
ups.status: OL
ups.timer.shutdown: 0
ups.timer.start: 0
ups.vendorid: 0463


-----

root@master:~# upscmd -l eaton
Instant commands supported on UPS [eaton]:

beeper.disable - Disable the UPS beeper
beeper.enable - Enable the UPS beeper
beeper.mute - Temporarily mute the UPS beeper
beeper.off - Obsolete (use beeper.disable or beeper.mute)
beeper.on - Obsolete (use beeper.enable)
load.off - Turn off the load immediately
load.off.delay - Turn off the load with a delay (seconds)
load.on - Turn on the load immediately
load.on.delay - Turn on the load with a delay (seconds)
shutdown.return - Turn off the load and return when power is back
shutdown.stayoff - Turn off the load and remain off
shutdown.stop - Stop a shutdown in progress
APC - USV - UPS-ES-700
- Hat unten einen Deckel für den Batterietausch - RBC17
- Server wurde für Austausch der Batterie herunter gefahren / Hat Überspannungsschutz Schuko Stecker und Batterie unterstützte Anschlüsse

APC - USV - Smart-UPS RT2000
- Kann im laufenden Betrieb getauscht werden / Achtung schwer
- Austauschbatterie RBC31


APC - USV - Smart-UPS 750
- Batterie austauschen / Wenn sie eine defekte Batterie anzeigt
- Austauschbatterie RBC48 für APC Smart-UPS 750
- Kann im laufenden Betrieb getauscht werden
- Abdeckung öffnen

- Alte Batterie bei Lasche sanft herausziehen

- Neue Batterie reingleiten lassen bis sie ansteht

- Sollte er weiterhin eine defekte Batterie anzeigen / warten bis sie aufgeladen wurde / ein paar Sekunden auf Test drücken - Achtung die Batterie wird 10 Sekunden unter Spannung genommen und „überprüft“ / alles sollte wieder grün leuchten :)

APC - USV - Management Card
- Ist die Karte Hotplug fähig ? d.h. kann sie während des Betriebs eingebaut werden ?
- Offiziell: https://www.youtube.com/watch?v=lhoMwt98zd0
- Wenn einer oder 2 länger sind dann JA

- Default Username: apc , Default Password: apc , Default IP: DHCP

HP Microserver Gen10 Plus
- Getestet Variante mit 8GB RAM und Intel Gold G5420 CPU BIOS U48 2.20 (27.10.2020)
- Achtung bei Software RAID
- Intelligent Provisioning funktioniert nicht / UEFI - SW RAID Controller / Treiber für Software RAID muss manuell geladen werden (SmartDQ.inf) bei der Installation (Das ist der Richtige: https://support.hpe.com/hpesc/public/swd/detail?swItemId=MTX_5b8eac1a8fe144b4ae4f537c75 - cp043250.exe )
- 4TB Samsung EVO SSD wird grundsätzlich vom Software RAID (Storage Administrator über Intelligent Provisioning) erkannt:

- 4TB Western Digital RED SA500 4TB wird ebenfalls erkannt (siehe RAID1 Test Software RAID)
- Läuft auch mit 64 GB RAM - https://www.amazon.de/gp/product/B096QFYNZS/ref=ppx_yo_dt_b_asin_title_o02_s00?ie=UTF8&psc=1 2x Stück - Maxano 32GB RAM passend für HP/HPE ProLiant Microserver (Gen10) Plus DDR4 2666MHz ECC UDIMM Arbeitsspeicher und HP Intel Xeon Variante
- zB: Festplattenaustausch


Software RAID Tests S100i
- Tests für die Windows Welt / Linux ist mit AHCI Mode SATA Platten und mdadm zufrieden

- Im Windows gibt es keine vernünftige onboard Software RAID Lösung
- Es wurde immer eine Standard Windows Installation durchgeführt / UEFI / S100 Software RAID Modus / gleich nach der Installation wurde die Performance getestet außer bei RAID5 siehe Info
- windows2016-8gb-ram-intel-gold-s100i-raid10-wd-red-2tb (4x WD RED 2TB, legacy disks)
------------------------------------------------------------------------------
CrystalDiskMark 8.0.1 x64 (C) 2007-2021 hiyohiyo
                                  Crystal Dew World: https://crystalmark.info/
------------------------------------------------------------------------------
* MB/s = 1,000,000 bytes/s [SATA/600 = 600,000,000 bytes/s]
* KB = 1000 bytes, KiB = 1024 bytes

[Read]
  SEQ    1MiB (Q=  8, T= 1):   267.799 MB/s [    255.4 IOPS] < 31080.81 us>
  SEQ    1MiB (Q=  1, T= 1):   208.463 MB/s [    198.8 IOPS] <  5026.58 us>
  RND    4KiB (Q= 32, T= 1):     4.280 MB/s [   1044.9 IOPS] < 30321.43 us>
  RND    4KiB (Q=  1, T= 1):     0.607 MB/s [    148.2 IOPS] <  6733.51 us>

[Write]
  SEQ    1MiB (Q=  8, T= 1):   267.846 MB/s [    255.4 IOPS] < 31023.84 us>
  SEQ    1MiB (Q=  1, T= 1):   243.702 MB/s [    232.4 IOPS] <  4296.21 us>
  RND    4KiB (Q= 32, T= 1):     2.805 MB/s [    684.8 IOPS] < 46330.22 us>
  RND    4KiB (Q=  1, T= 1):     2.585 MB/s [    631.1 IOPS] <  1579.26 us>

Profile: Default
   Test: 1 GiB (x5) [C: 0% (11/3725GiB)]
   Mode: [Admin]
   Time: Measure 5 sec / Interval 5 sec
   Date: 2021/04/08 15:04:17
     OS: Windows Server 2016 Server Standard (full installation) [10.0 Build 14393] (x64)
- windows2019-8gb-ram-intel-gold-s100i-raid-raid10-wd-red-2tb (4x WD RED 2TB, legacy disks)
------------------------------------------------------------------------------
CrystalDiskMark 8.0.1 x64 (C) 2007-2021 hiyohiyo
                                  Crystal Dew World: https://crystalmark.info/
------------------------------------------------------------------------------
* MB/s = 1,000,000 bytes/s [SATA/600 = 600,000,000 bytes/s]
* KB = 1000 bytes, KiB = 1024 bytes

[Read]
  SEQ    1MiB (Q=  8, T= 1):   300.299 MB/s [    286.4 IOPS] < 27643.07 us>
  SEQ    1MiB (Q=  1, T= 1):   210.338 MB/s [    200.6 IOPS] <  4962.84 us>
  RND    4KiB (Q= 32, T= 1):     4.359 MB/s [   1064.2 IOPS] < 29797.25 us>
  RND    4KiB (Q=  1, T= 1):     0.593 MB/s [    144.8 IOPS] <  6889.28 us>

[Write]
  SEQ    1MiB (Q=  8, T= 1):   239.316 MB/s [    228.2 IOPS] < 34810.64 us>
  SEQ    1MiB (Q=  1, T= 1):    65.638 MB/s [     62.6 IOPS] < 15942.03 us>
  RND    4KiB (Q= 32, T= 1):     1.789 MB/s [    436.8 IOPS] < 72190.45 us>
  RND    4KiB (Q=  1, T= 1):     0.289 MB/s [     70.6 IOPS] < 14102.20 us>

Profile: Default
   Test: 1 GiB (x5) [C: 0% (11/3725GiB)]
   Mode: [Admin]
   Time: Measure 5 sec / Interval 5 sec
   Date: 2021/04/08 17:05:44
     OS: Windows Server 2019 Server Standard (full installation) [10.0 Build 17763] (x64)
- windows2019-8gb-ram-intel-gold-s100i-raid-raid10-samsung-evo-500gb (4x 500 GB Samsung 860 EVO SSD, RAID 10)
------------------------------------------------------------------------------
CrystalDiskMark 8.0.1 x64 (C) 2007-2021 hiyohiyo
                                  Crystal Dew World: https://crystalmark.info/
------------------------------------------------------------------------------
* MB/s = 1,000,000 bytes/s [SATA/600 = 600,000,000 bytes/s]
* KB = 1000 bytes, KiB = 1024 bytes

[Read]
  SEQ    1MiB (Q=  8, T= 1):  1923.636 MB/s [   1834.5 IOPS] <  4352.23 us>
  SEQ    1MiB (Q=  1, T= 1):  1177.983 MB/s [   1123.4 IOPS] <   889.57 us>
  RND    4KiB (Q= 32, T= 1):   409.800 MB/s [ 100048.8 IOPS] <   312.40 us>
  RND    4KiB (Q=  1, T= 1):    47.919 MB/s [  11699.0 IOPS] <    85.32 us>

[Write]
  SEQ    1MiB (Q=  8, T= 1):   464.260 MB/s [    442.8 IOPS] < 17985.56 us>
  SEQ    1MiB (Q=  1, T= 1):   294.616 MB/s [    281.0 IOPS] <  3555.97 us>
  RND    4KiB (Q= 32, T= 1):    52.429 MB/s [  12800.0 IOPS] <  2495.48 us>
  RND    4KiB (Q=  1, T= 1):     2.205 MB/s [    538.3 IOPS] <  1855.12 us>

Profile: Default
   Test: 1 GiB (x5) [C: 1% (11/931GiB)]
   Mode: [Admin]
   Time: Measure 5 sec / Interval 5 sec
   Date: 2021/04/09 16:53:40
     OS: Windows Server 2019 Server Standard (full installation) [10.0 Build 17763] (x64)
- windows2019-8gb-ram-intel-gold-s100i-raid-raid5-still-initializing-samsung-evo-500gb ( 4x Samsung 860 EVO 500GB , RAID5 )
------------------------------------------------------------------------------
CrystalDiskMark 8.0.1 x64 (C) 2007-2021 hiyohiyo
                                  Crystal Dew World: https://crystalmark.info/
------------------------------------------------------------------------------
* MB/s = 1,000,000 bytes/s [SATA/600 = 600,000,000 bytes/s]
* KB = 1000 bytes, KiB = 1024 bytes

[Read]
  SEQ    1MiB (Q=  8, T= 1):  1939.709 MB/s [   1849.9 IOPS] <  4279.09 us>
  SEQ    1MiB (Q=  1, T= 1):  1070.043 MB/s [   1020.5 IOPS] <   979.29 us>
  RND    4KiB (Q= 32, T= 1):   404.744 MB/s [  98814.5 IOPS] <   316.02 us>
  RND    4KiB (Q=  1, T= 1):    47.503 MB/s [  11597.4 IOPS] <    86.02 us>

[Write]
  SEQ    1MiB (Q=  8, T= 1):   167.128 MB/s [    159.4 IOPS] < 49750.99 us>
  SEQ    1MiB (Q=  1, T= 1):   116.178 MB/s [    110.8 IOPS] <  9013.80 us>
  RND    4KiB (Q= 32, T= 1):     9.607 MB/s [   2345.5 IOPS] < 13594.10 us>
  RND    4KiB (Q=  1, T= 1):     2.007 MB/s [    490.0 IOPS] <  2038.83 us>

Profile: Default
   Test: 1 GiB (x5) [C: 1% (11/1397GiB)]
   Mode: [Admin]
   Time: Measure 5 sec / Interval 5 sec
   Date: 2021/04/10 11:57:57
     OS: Windows Server 2019 Server Standard (full installation) [10.0 Build 17763] (x64)
- windows2019-8gb-ram-intel-gold-s100i-raid-raid5-working-raid-samsung-evo-500gb (4x 500GB Samsung 860 EVO , RAID5 finished)
------------------------------------------------------------------------------
CrystalDiskMark 8.0.1 x64 (C) 2007-2021 hiyohiyo
                                  Crystal Dew World: https://crystalmark.info/
------------------------------------------------------------------------------
* MB/s = 1,000,000 bytes/s [SATA/600 = 600,000,000 bytes/s]
* KB = 1000 bytes, KiB = 1024 bytes

[Read]
  SEQ    1MiB (Q=  8, T= 1):  1952.294 MB/s [   1861.9 IOPS] <  4242.93 us>
  SEQ    1MiB (Q=  1, T= 1):  1072.455 MB/s [   1022.8 IOPS] <   977.18 us>
  RND    4KiB (Q= 32, T= 1):   404.142 MB/s [  98667.5 IOPS] <   313.92 us>
  RND    4KiB (Q=  1, T= 1):    48.063 MB/s [  11734.1 IOPS] <    85.05 us>

[Write]
  SEQ    1MiB (Q=  8, T= 1):   147.002 MB/s [    140.2 IOPS] < 56671.01 us>
  SEQ    1MiB (Q=  1, T= 1):   106.959 MB/s [    102.0 IOPS] <  9779.59 us>
  RND    4KiB (Q= 32, T= 1):     9.537 MB/s [   2328.4 IOPS] < 13700.44 us>
  RND    4KiB (Q=  1, T= 1):     2.009 MB/s [    490.5 IOPS] <  2036.38 us>

Profile: Default
   Test: 1 GiB (x5) [C: 1% (11/1397GiB)]
   Mode: [Admin]
   Time: Measure 5 sec / Interval 5 sec
   Date: 2021/04/10 12:37:57
     OS: Windows Server 2019 Server Standard (full installation) [10.0 Build 17763] (x64)
- windows2019-8gb-ram-intel-gold-s100i-raid-raid1-wd-red-sa500-4tb (2x 4TB WD RED SA500, RAID1)
------------------------------------------------------------------------------
CrystalDiskMark 8.0.1 x64 (C) 2007-2021 hiyohiyo
                                  Crystal Dew World: https://crystalmark.info/
------------------------------------------------------------------------------
* MB/s = 1,000,000 bytes/s [SATA/600 = 600,000,000 bytes/s]
* KB = 1000 bytes, KiB = 1024 bytes

[Read]
  SEQ    1MiB (Q=  8, T= 1):  1113.818 MB/s [   1062.2 IOPS] <  7516.94 us>
  SEQ    1MiB (Q=  1, T= 1):   721.250 MB/s [    687.8 IOPS] <  1453.19 us>
  RND    4KiB (Q= 32, T= 1):   405.010 MB/s [  98879.4 IOPS] <   321.88 us>
  RND    4KiB (Q=  1, T= 1):    38.070 MB/s [   9294.4 IOPS] <   107.36 us>

[Write]
  SEQ    1MiB (Q=  8, T= 1):   252.066 MB/s [    240.4 IOPS] < 33103.10 us>
  SEQ    1MiB (Q=  1, T= 1):   204.272 MB/s [    194.8 IOPS] <  5126.56 us>
  RND    4KiB (Q= 32, T= 1):    30.194 MB/s [   7371.6 IOPS] <  4301.41 us>
  RND    4KiB (Q=  1, T= 1):     6.959 MB/s [   1699.0 IOPS] <   587.67 us>

Profile: Default
   Test: 1 GiB (x5) [C: 0% (11/3725GiB)]
   Mode: [Admin]
   Time: Measure 5 sec / Interval 5 sec
   Date: 2021/04/12 16:26:27
     OS: Windows Server 2019 Server Standard (full installation) [10.0 Build 17763] (x64)
- windows-2019-16gb-ram-intel-xeon-s100i-raid-raid10-wd-red-pro-4tb
------------------------------------------------------------------------------
CrystalDiskMark 8.0.1 x64 (C) 2007-2021 hiyohiyo
                                  Crystal Dew World: https://crystalmark.info/
------------------------------------------------------------------------------
* MB/s = 1,000,000 bytes/s [SATA/600 = 600,000,000 bytes/s]
* KB = 1000 bytes, KiB = 1024 bytes

[Read]
  SEQ    1MiB (Q=  8, T= 1):   633.306 MB/s [    604.0 IOPS] < 13218.15 us>
  SEQ    1MiB (Q=  1, T= 1):   474.579 MB/s [    452.6 IOPS] <  2207.90 us>
  RND    4KiB (Q= 32, T= 1):     5.724 MB/s [   1397.5 IOPS] < 22638.94 us>
  RND    4KiB (Q=  1, T= 1):     0.942 MB/s [    230.0 IOPS] <  4342.87 us>

[Write]
  SEQ    1MiB (Q=  8, T= 1):   470.154 MB/s [    448.4 IOPS] < 17709.13 us>
  SEQ    1MiB (Q=  1, T= 1):   124.802 MB/s [    119.0 IOPS] <  8390.17 us>
  RND    4KiB (Q= 32, T= 1):     5.405 MB/s [   1319.6 IOPS] < 24114.28 us>
  RND    4KiB (Q=  1, T= 1):     4.406 MB/s [   1075.7 IOPS] <   928.29 us>

Profile: Default
   Test: 1 GiB (x5) [D: 0% (0/7146GiB)]
   Mode: [Admin]
   Time: Measure 5 sec / Interval 5 sec
   Date: 2021/04/21 17:15:43
     OS: Windows Server 2019 Server Standard (full installation) [10.0 Build 17763] (x64)
HP Smart Array P440
- RAID Levels aus den Quick Specs

HP 255 G7
- Factory Reset - Start → ESC → es erscheint ein Menü mit Punkten → F11 Factory dafaults und den Anweisungen folgen
HP ProBook 440 G7
- Variante mit I7 und Intel onboard Grafikkarte
- Debian Buster + Backports Kernel
- Kartenlesegerät defekt ? SD ?
- M.2 NVME wurde per USB3 Adapter (https://www.amazon.de/gp/product/B07TSBR114/ref=ppx_yo_dt_b_asin_image_o05_s00?ie=UTF8&psc=1) als /dev/sdb für das System vorbereitet secure Boot ist aus UEFI Boot aktiviert und LEGACY Boot deaktiviert
- RAM Upgrade auf 64GB funktioniert für alle Freunde der Virtualisierung - (https://www.amazon.de/-/en/dp/B0B54SLQ84?psc=1&ref=ppx_yo2ov_dt_b_product_details)
- Achtung Ich wollte bereits die RAM zurück schicken / Nach erfolgtem BIOS Upgrade und vormaligem Ausbau des Akkus (2x Schrauben einfach rausheben) / Einbau der RAMS / Zusammenbau und Start des Notebooks ~1-2 Minuten warten, da Bildschirm schwarz und Num pulsiert auf Tastatur - Offenbar wird ein RAM check durchgeführt ohne dass dies auf dem Bildschirm ersichtlich ist / es erfolgt im Hintergrund ein Reboot und der Bildschirm kehrt mit 64GB RAM zurück :)

INTEL DH77EB
- Desktop Mainboard von Intel / Sollte ein BIOS Passwort gesetzt sein kann es laut Hersteller gelöscht werden indem:
- Rechner vom Strom nehmen
- Auffinden des Jumpers / Position auf 2-3 wechseln
- Rechner mit Strom versorgen / Tastatur / Bootet im „Clear Bios Modus“
- Clear BIOS Passwort entfernen / speichern
- Rechner vom Strom nehmen
- Ursprüngliche Jumper Konfiguration wieder herstellen
- Rechner wieder mit Strom versorgen

- Achtung Es ist auch möglich dass es nicht funktioniert / hatte einen unerklärlichen Fall - es kann dann als bricked betrachtet werden / außer BIOS Zugriff ist nicht erforderlich
SmartLink Cable
- ICZI USB 3.0 Datenkabel: https://www.amazon.de/gp/product/B01IVP5B2W/ref=ppx_yo_dt_b_asin_title_o03_s00?ie=UTF8&psc=1
- 5Gbit Ethernet Link über USB3 wäre nett ↔ ~1Gbit in der Praxis
- Getestet auf Kali Linux 5.5.0-kali2-amd64 und 5.3.0-kali2-amd64 Kernel
- Kabel wird automatisch über cdc_ether als usb0 erkannt
Bus 003 Device 003: ID 0ea0:7301 Ours Technology, Inc. SmartKMLink
- Performance Tests - MTU und Window Sizes alles default
root@mrWhiteGhost:/home/urnilxfgbez# iperf -c 192.168.1.1 -t 300 -i 60
------------------------------------------------------------
Client connecting to 192.168.1.1, TCP port 5001
TCP window size:  476 KByte (default)
------------------------------------------------------------
[  3] local 192.168.1.2 port 45776 connected with 192.168.1.1 port 5001
[ ID] Interval       Transfer     Bandwidth
[  3]  0.0-60.0 sec  8.99 GBytes  1.29 Gbits/sec
[  3] 60.0-120.0 sec  8.97 GBytes  1.28 Gbits/sec
[  3] 120.0-180.0 sec  8.99 GBytes  1.29 Gbits/sec
[  3] 180.0-240.0 sec  8.98 GBytes  1.29 Gbits/sec
[  3] 240.0-300.0 sec  8.98 GBytes  1.29 Gbits/sec
[  3]  0.0-300.0 sec  44.9 GBytes  1.29 Gbits/sec

root@mrWhiteGhost:/home/urnilxfgbez# ip addr ls usb0
8: usb0: <BROADCAST,MULTICAST,UP,LOWER_UP> mtu 1500 qdisc pfifo_fast state UNKNOWN group default qlen 1000
    link/ether 8e:0b:6e:2c:e1:d2 brd ff:ff:ff:ff:ff:ff
    inet 192.168.1.2/24 brd 192.168.1.255 scope global usb0
       valid_lft forever preferred_lft forever
root@mrWhiteGhost:/home/urnilxfgbez# ethtool usb0
Settings for usb0:
	Current message level: 0x00000007 (7)
			       drv probe link
	Link detected: yes
- vielleicht würde QNAP QNA-UC5G1T USB 3.0 auf 5GbE Adapter mehr Datendurchsatzrate schaffen https://www.amazon.de/gp/product/B07RY415TM/ref=ox_sc_saved_title_1?smid=A3JWKAKR8XB7XF&psc=1
ZOTAC ZBOX CI527
- Linux Mint 19 Mate 64Bit
- Problem:
- angesteckt per HDMI auf Sony Bravia TV - Auflösung bei maximal 1024×768 Ausschnitt komplett verkleinert - kein Vollbild
- Beim Bootvorgang kein Bild (ROOT ist verschlüsselt) - Umstieg auf 4.18 generic Kernel dann ok (achtung Module installieren für Kernel sonst kein USB bei cryptsetup Passworteingabe)
- Lösung: DisplayPort auf HDMI Adapter einstecken bei Display Port zB: https://www.amazon.de/gp/product/B010SDZZ80/ref=ppx_yo_dt_b_asin_title_o01__o00_s00?ie=UTF8&psc=1
- Hintegrund: Offenbar gibt es Bug im Kernel der bis zu 4.18 reicht - Kernel Fehlermeldung zeugt davon in den Logs (*…link..intel…*) - Kabylake flanscht HDMI und Display Port zusammen - bekommt ihm offenbar nicht
HP ML350 Gen9 / HP Microserver gen8
- Achtung Broadcom Netzwerkkarten
- hat Zusammenhang mit 32Bit Ubuntu 18.04 4.15er Kernel Installation
- Deaktivieren von VMQ in GUI und powershell hat in diesem Fall NICHTS gebracht
- Intel 350 Dual Interface Karte wurde installiert !!!
- Broadcom Firmware/Treiber Upgrades von der HP Seite installiert (>202)
- Microsoft Quote:
Cause
This is a known issue with Broadcom NetXtreme 1-gigabit network adapters that use the b57nd60a.sys driver, when VMQ is enabled on the network adapter. (By default, VMQ is enabled by the Broadcom network driver.)

Broadcom designates these network adapters as 57xx based chipsets. They include 5714, 5715, 5717, 5718, 5719, 5720, 5721, 5722, 5723, and 5780.
These network adapters are also sold under different model numbers by some server OEMs. HP sells these drivers under model numbers NC1xx, NC3xx, and NC7xx. You may be using driver version 16.2, 16.4, or 16.6, depending on which OEM version you are using or whether you are using the Broadcom driver version.
Resolution
This issue is resolved in Broadcom driver b57nd60a.sys version 16.8 and newer. In March 2015, Broadcom published driver version 17.0 for download. In April 2015, HP published version 16.8 of the driver for their affected network adapters, here is one of their download locations. Please contact your server OEM if you need a driver that is specific to your server.

If you are unable to update your network adapter driver to resolve the issue, you can work around the issue by disabling VMQ on each affected Broadcom network adapter by using the Set-NetAdapterVmq Windows PowerShell command. For example, if you have a dual-port network adapter, and if the ports are named NIC 1 and NIC 2 in Windows, you would disable VMQ on each adapter by using the following commands:

Set-NetAdapterVmq -Name "NIC 1" -Enabled $False
Set-NetAdapterVmq -Name "NIC 2" -Enabled $False
You can confirm that VMQ is disabled on the correct network adapters by using the Get-NetAdapterVmq Windows PowerShell command.

Note By default, VMQ is disabled on the Hyper-V virtual switch for virtual machines that are using 1-gigabit network adapters. VMQ is enabled on a Hyper-V virtual switch only when the system is using 10-gigabit or faster network adapters. This means that by disabling VMQ on the Broadcom network adapter, you are not losing network performance or any other benefits because this is the default. However, you need to do this to work around the driver issue.

Get-NetAdapterVmqQueue shows the virtual machine queues (VMQs) that are allocated on network adapters. You will not see any virtual machine queues that are allocated to 1-gigabit network adapters by default.
- Symptome:
- Netzwerkverbindung zu den virtuellen Maschinen fällt aus
- Virtuelle Maschinen können nicht mehr heruntergefahren werden (Problem mit Netzwerk) trifft Linux, Windows..
- Nur ein Kaltstart des Hostsystems regeneriert die Lage
- VMQ deaktivieren auf Powershell (get-Netadaptervmq) und in der GUI vom Hyper V bei den erweiterten Eigenschaften !!

Hardware RAID Controller 7.2k RAID1 vs SSD RAID10
- Avago MegaRAID RAID SAS 9361-8i Controller (mit Battery Pack)
- SSD RAID10
------------------------------------------------------------------------------
CrystalDiskMark 7.0.0 x64 (C) 2007-2019 hiyohiyo
                                  Crystal Dew World: https://crystalmark.info/
------------------------------------------------------------------------------
* MB/s = 1,000,000 bytes/s [SATA/600 = 600,000,000 bytes/s]
* KB = 1000 bytes, KiB = 1024 bytes

[Read]
Sequential 1MiB (Q=  8, T= 1):  2917.503 MB/s [   2782.3 IOPS] <  2872.92 us>
Sequential 1MiB (Q=  1, T= 1):  1146.174 MB/s [   1093.1 IOPS] <   913.20 us>
    Random 4KiB (Q= 32, T=16):   479.321 MB/s [ 117021.7 IOPS] <  4370.88 us>
    Random 4KiB (Q=  1, T= 1):    33.044 MB/s [   8067.4 IOPS] <   123.25 us>

[Write]
Sequential 1MiB (Q=  8, T= 1):  1079.696 MB/s [   1029.7 IOPS] <  7743.43 us>
Sequential 1MiB (Q=  1, T= 1):  1051.736 MB/s [   1003.0 IOPS] <   994.51 us>
    Random 4KiB (Q= 32, T=16):   162.600 MB/s [  39697.3 IOPS] < 12873.30 us>
    Random 4KiB (Q=  1, T= 1):    63.628 MB/s [  15534.2 IOPS] <    63.89 us>

Profile: Default
   Test: 1 GiB (x5) [Interval: 5 sec] <DefaultAffinity=DISABLED>
   Date: 2020/06/17 13:21:10
     OS: Windows Server 2019 Server Standard (full installation) [10.0 Build 17763] (x64)
- SAS 7.2k RAID1
------------------------------------------------------------------------------
CrystalDiskMark 7.0.0 x64 (C) 2007-2019 hiyohiyo
                                  Crystal Dew World: https://crystalmark.info/
------------------------------------------------------------------------------
* MB/s = 1,000,000 bytes/s [SATA/600 = 600,000,000 bytes/s]
* KB = 1000 bytes, KiB = 1024 bytes

[Read]
Sequential 1MiB (Q=  8, T= 1):   512.458 MB/s [    488.7 IOPS] < 16287.11 us>
Sequential 1MiB (Q=  1, T= 1):   434.599 MB/s [    414.5 IOPS] <  2409.16 us>
    Random 4KiB (Q= 32, T=16):    12.390 MB/s [   3024.9 IOPS] <162041.59 us>
    Random 4KiB (Q=  1, T= 1):     1.385 MB/s [    338.1 IOPS] <  2946.58 us>

[Write]
Sequential 1MiB (Q=  8, T= 1):   293.193 MB/s [    279.6 IOPS] < 28396.52 us>
Sequential 1MiB (Q=  1, T= 1):   282.474 MB/s [    269.4 IOPS] <  3703.09 us>
    Random 4KiB (Q= 32, T=16):    11.424 MB/s [   2789.1 IOPS] <180483.72 us>
    Random 4KiB (Q=  1, T= 1):    10.530 MB/s [   2570.8 IOPS] <   386.99 us>

Profile: Default
   Test: 1 GiB (x5) [Interval: 5 sec] <DefaultAffinity=DISABLED>
   Date: 2020/06/17 13:28:21
     OS: Windows Server 2019 Server Standard (full installation) [10.0 Build 17763] (x64)
SSD Hardware RAID6 vs SSD Hardware RAID10
- HP ML350 Gen9 - Hardware RAID (Smart Array P440 (PCI Express)) mit 6x WD RED SA500 SSD
- Intel Xeon E5-2620V4 @ 2.1GHZ (2 Prozessoren) , 64 GB RAM
- RAID6 - alle Einstellungen default / durchgeführt nach Initialisierung
-----------------------------------------------------------------------
CrystalDiskMark 5.2.1 x64 (C) 2007-2017 hiyohiyo
                           Crystal Dew World : http://crystalmark.info/
-----------------------------------------------------------------------
* MB/s = 1,000,000 bytes/s [SATA/600 = 600,000,000 bytes/s]
* KB = 1000 bytes, KiB = 1024 bytes

   Sequential Read (Q= 32,T= 1) :  2006.851 MB/s
  Sequential Write (Q= 32,T= 1) :   190.731 MB/s
  Random Read 4KiB (Q= 32,T= 1) :   592.878 MB/s [144745.6 IOPS]
 Random Write 4KiB (Q= 32,T= 1) :    51.100 MB/s [ 12475.6 IOPS]
         Sequential Read (T= 1) :   879.952 MB/s
        Sequential Write (T= 1) :   213.913 MB/s
   Random Read 4KiB (Q= 1,T= 1) :    35.123 MB/s [  8575.0 IOPS]
  Random Write 4KiB (Q= 1,T= 1) :     5.817 MB/s [  1420.2 IOPS]

  Test : 2048 MiB [H: 0.0% (0.6/14903.8 GiB)] (x5)  [Interval=5 sec]
  Date : 2021/03/02 20:00:56
    OS : Windows Server 2012 R2 Server Standard (full installation) [6.3 Build 9600] (x64)
- RAID10 - alle Einstellungen default
-----------------------------------------------------------------------
CrystalDiskMark 5.2.1 x64 (C) 2007-2017 hiyohiyo
                           Crystal Dew World : http://crystalmark.info/
-----------------------------------------------------------------------
* MB/s = 1,000,000 bytes/s [SATA/600 = 600,000,000 bytes/s]
* KB = 1000 bytes, KiB = 1024 bytes

   Sequential Read (Q= 32,T= 1) :  2048.179 MB/s
  Sequential Write (Q= 32,T= 1) :   854.591 MB/s
  Random Read 4KiB (Q= 32,T= 1) :   589.887 MB/s [144015.4 IOPS]
 Random Write 4KiB (Q= 32,T= 1) :    88.498 MB/s [ 21606.0 IOPS]
         Sequential Read (T= 1) :   905.657 MB/s
        Sequential Write (T= 1) :   318.575 MB/s
   Random Read 4KiB (Q= 1,T= 1) :    34.334 MB/s [  8382.3 IOPS]
  Random Write 4KiB (Q= 1,T= 1) :     7.571 MB/s [  1848.4 IOPS]

  Test : 2048 MiB [H: 0.0% (0.5/11177.8 GiB)] (x5)  [Interval=5 sec]
  Date : 2021/03/02 21:54:01
    OS : Windows Server 2012 R2 Server Standard (full installation) [6.3 Build 9600] (x64)
Software RAID1 SSD vs 15K Hardware RAID SAS RAID1
- HP ML350 Gen9 - Hardware RAID (Smart Array P440 (PCI Express)) mit 2 15K SAS Serverplatten
- Intel Xeon E5-2620V4 @ 2.1GHZ (2 Prozessoren) , 64 GB RAM
-----------------------------------------------------------------------
CrystalDiskMark 5.2.1 x64 (C) 2007-2017 hiyohiyo
                           Crystal Dew World : http://crystalmark.info/
-----------------------------------------------------------------------
* MB/s = 1,000,000 bytes/s [SATA/600 = 600,000,000 bytes/s]
* KB = 1000 bytes, KiB = 1024 bytes

   Sequential Read (Q= 32,T= 1) :   436.417 MB/s
  Sequential Write (Q= 32,T= 1) :   474.819 MB/s
  Random Read 4KiB (Q= 32,T= 1) :    14.301 MB/s [  3491.5 IOPS]
 Random Write 4KiB (Q= 32,T= 1) :   116.758 MB/s [ 28505.4 IOPS]
         Sequential Read (T= 1) :   506.653 MB/s
        Sequential Write (T= 1) :   406.023 MB/s
   Random Read 4KiB (Q= 1,T= 1) :     3.965 MB/s [   968.0 IOPS]
  Random Write 4KiB (Q= 1,T= 1) :    91.430 MB/s [ 22321.8 IOPS]

  Test : 2048 MiB [C: 24.3% (67.7/278.8 GiB)] (x5)  [Interval=5 sec]
  Date : 2019/07/02 14:20:51
    OS : Windows Server 2012 R2 Server Standard (full installation) [6.3 Build 9600] (x64)
- HP Microserver gen8 - Software RAID1 (Windows 2012r2 Software RAID1 - AHCI Modus, Bessere Leistung , Schreibcache JA, Windows veranlasstes Leeren des Cache deaktivieren) mit 2x 256 GB Samsung SSD (consumer Version, eine 840er und eine 860er EVO )
- Intel Celeron G1610 2.3GHZ, 4GB RAM
-----------------------------------------------------------------------
CrystalDiskMark 5.2.1 x64 (C) 2007-2017 hiyohiyo
                           Crystal Dew World : http://crystalmark.info/
-----------------------------------------------------------------------
* MB/s = 1,000,000 bytes/s [SATA/600 = 600,000,000 bytes/s]
* KB = 1000 bytes, KiB = 1024 bytes

   Sequential Read (Q= 32,T= 1) :  1045.927 MB/s
  Sequential Write (Q= 32,T= 1) :   500.788 MB/s
  Random Read 4KiB (Q= 32,T= 1) :   218.880 MB/s [ 53437.5 IOPS]
 Random Write 4KiB (Q= 32,T= 1) :   119.822 MB/s [ 29253.4 IOPS]
         Sequential Read (T= 1) :   523.572 MB/s
        Sequential Write (T= 1) :   490.762 MB/s
   Random Read 4KiB (Q= 1,T= 1) :    38.264 MB/s [  9341.8 IOPS]
  Random Write 4KiB (Q= 1,T= 1) :    79.639 MB/s [ 19443.1 IOPS]

  Test : 2048 MiB [C: 3.8% (8.9/232.5 GiB)] (x5)  [Interval=5 sec]
  Date : 2015/11/03 1:46:30
    OS : Windows Server 2012 R2 Server Standard (full installation) [6.3 Build 9600] (x64)
Software INTEL FAKE RAID1 SSD (2x 8TB Samsung PM893)
- CPU: Intel Xeon E-2386G (3,50 GHz, 6-Core, 12 MB)
- RAM: RAM ECC 64GB - 32 GB ECC DDR4 2933 RAM 2 Rank ATP Server-Grade (2x 32768 MB)
- Mainboard: Supermicro Mainboard X12STH-LN4F
- SSD: 2x 7,68 TB Samsung PM893 2,5“ SATA SSD
- Betriebssystem: Windows 2019 Standard (Nov 2022 build) / Treiber für RAID sind schon dabei


-----------------------------------------------------------------------
CrystalDiskMark 5.2.1 x64 (C) 2007-2017 hiyohiyo
                           Crystal Dew World : http://crystalmark.info/
-----------------------------------------------------------------------
* MB/s = 1,000,000 bytes/s [SATA/600 = 600,000,000 bytes/s]
* KB = 1000 bytes, KiB = 1024 bytes

   Sequential Read (Q= 32,T= 1) :  1092.092 MB/s
  Sequential Write (Q= 32,T= 1) :   502.314 MB/s
  Random Read 4KiB (Q= 32,T= 1) :   249.074 MB/s [ 60809.1 IOPS]
 Random Write 4KiB (Q= 32,T= 1) :   186.275 MB/s [ 45477.3 IOPS]
         Sequential Read (T= 1) :  1031.144 MB/s
        Sequential Write (T= 1) :   479.743 MB/s
   Random Read 4KiB (Q= 1,T= 1) :    29.275 MB/s [  7147.2 IOPS]
  Random Write 4KiB (Q= 1,T= 1) :    62.193 MB/s [ 15183.8 IOPS]

  Test : 4096 MiB [D: 55.1% (3601.3/6531.9 GiB)] (x5)  [Interval=5 sec]
  Date : 2023/08/03 10:09:43
    OS : Windows Server 2016 Server Standard (full installation) [10.0 Build 17763] (x64)
HP ProCurve 2510-48G
- CPU Load in Prozent:
CPU LOAD
1.3.6.1.4.1.11.2.14.11.5.1.9.6.1.0
- Temperatur „State“ alles != 4 zb. 3 ist schlecht
OID / temperatur State (https://kb.paessler.com/en/topic/73833-can-i-monitor-my-hp-procurve-switch-health)
1.3.6.1.4.1.11.2.14.11.1.2.6.1.4.4

State	Description
1	Invalid Value
3	Bad
3	Warning
4	Good
5	Not Present
HPE1950 - 48G
- Default Zugang Benutzername: admin Passwort: keines
- VLAN 10 hinzufügen als „Management“ VLAN für den Switch / tagged auf den 10Gbit Uplink Ports und untagged am Port 48 für direktes Debugging / 172.23.10.11 als Management IP / Im Default VLAN 1 einfach IP „wegnehmen“ d.h. nicht konfigurieren dann gibts auch keinen Zugriff aus dem Default VLAN


- Variante 2 VLAN konfigurieren Tagged 48,200 , pvid/untagged im VLAN 10 direkt beim interface 47

- Cli Advanced Modus über SSH - xtd-cli-mode
- Passwort: foes-bent-pile-atom-ship
- Danach system-view - configgen
<switch-core01>?
User view commands:
  display       Display current system information
  exit          Alias for 'quit'
  initialize    Delete the startup configuration file and reboot system
  ipsetup       IP configuration
  no            Alias for 'undo'
  password      Specify password of local user
  ping          Ping function
  poe           Power over Ethernet
  quit          Exit from current command view
  reboot        Reboot operation
  show          Alias for 'display'
  summary       Display summary information of the device
  telnet        Establish a telnet connection
  transceiver   Enable transceiver phony alarm
  undo          Cancel current setting
  upgrade       Upgrade the system boot file or the Boot ROM program
  xtd-cli-mode  Switch to extended CLI mode to display and execute all commands
                (special authorization required)

<switch-core01>xtd-cli-mode
All commands can be displayed and executed in extended CLI mode. Switch to extended CLI mode? [Y/N]:y
Password:
Warning: Extended CLI mode is intended for developers to test the system. Before using commands in extended CLI mode, contact the Technical Support and make sure you know the potential impact on the device and the network.
<switch-core01>?
User view commands:
  archive             Archive configuration
  arp                 Address Resolution Protocol (ARP) module
  backup              Backup operation
  boot-loader         Software image file management
  bootrom             Update/read/backup/restore bootrom
  cd                  Change current directory
  cfd                 Connectivity Fault Detection (CFD) module
  clock               Specify the system clock
  copy                Copy a file
  debugging           Enable system debugging functions
  delete              Delete a file
  diagnostic-logfile  Diagnostic log file configuration
  dir                 Display files and directories on the storage media
  display             Display current system information
  erase               Alias for 'delete'
  exception           Exception information configuration
  exit                Alias for 'quit'
  fdisk               Partition a storage medium
  fixdisk             Check and repair a storage medium
  format              Format a storage medium
  free                Release a connection
  ftp                 Open an FTP connection
  gunzip              Decompress file
  ....
  ....
- Statische Route hinzufügen - ich möchte 10.0.0.0/24 über 172.23.10.1 / VLAN10 routen

- Überwachung der Temperaturen über SNMP
Hauptwalk: 1.3.6.1.4.1.25506.2.6.1.1.1.1.12

HP 1950 / 48 Port / 2 10 Gbit - 2 SFP+


Temperaturen:

iso.3.6.1.4.1.25506.2.6.1.1.1.1.12.192
iso.3.6.1.4.1.25506.2.6.1.1.1.1.12.201
iso.3.6.1.4.1.25506.2.6.1.1.1.1.12.202
iso.3.6.1.4.1.25506.2.6.1.1.1.1.12.203
iso.3.6.1.4.1.25506.2.6.1.1.1.1.12.204
iso.3.6.1.4.1.25506.2.6.1.1.1.1.12.205
iso.3.6.1.4.1.25506.2.6.1.1.1.1.12.206
iso.3.6.1.4.1.25506.2.6.1.1.1.1.12.382


HP 1950 / 16 Port 10 Gbit Ports - 4 SFP+
iso.3.6.1.4.1.25506.2.6.1.1.1.1.12.212
iso.3.6.1.4.1.25506.2.6.1.1.1.1.12.220
iso.3.6.1.4.1.25506.2.6.1.1.1.1.12.222
iso.3.6.1.4.1.25506.2.6.1.1.1.1.12.223
iso.3.6.1.4.1.25506.2.6.1.1.1.1.12.224
iso.3.6.1.4.1.25506.2.6.1.1.1.1.12.442
- Überwachung der CPU Auslastung (Prozent der letzten Minute) über SNMP
Hauptwalk: 1.3.6.1.4.1.25506.2.6.1.1.1.1.6

CPU:

HP 1950 / 48 Port / 2 10 Gbit - 2 SFP+
iso.3.6.1.4.1.25506.2.6.1.1.1.1.6.192

HP 1950 / 16 Port 10 Gbit Ports - 4 SFP+
iso.3.6.1.4.1.25506.2.6.1.1.1.1.6.212
HPE1920 - 48G
- Default Route hinzufügen am Beispiel Destination 0.0.0.0 , MASK 0.0.0.0 , Next HOP 192.168.64.254

- Port 47 tagged zu VLAN 40 hinzufügen Hybrid port der untagged im Default VLAN ist und Tagged im VLAN 40


D-Link DGS-1210-48
- Achtung Safeguard Engine deaktivieren !!
- Sonst nicht nachvollziehbarer Paket loss
- Default IP: 10.90.90.90
TP-Link EAP 225 v3
- Achtung passives PoE d.h. PoE Injektor von TP-Link verwenden / war bei Paket dabei
- Kompatibel mit openwrt 21.02 (Target: ATH79 / Target Profile: EAP 225 v3 / ath10k-firmware-qca9888-ct / ath10k-board-qca9888 für 5GHZ Frequenzband)
- Openwrt Installation:
- SSH aktivieren
- cliclientd stopcs
bin $ cat /proc/version
Linux version 3.3.8 (jenkins@sohoiapbuild) (gcc version 4.3.3 (GCC) ) #1 Tue Jun 30 11:11:17 CST 2020

/bin $ cliclientd stopcs
/bin $ Success.

/bin $
- Upload openwrt 21.02 Image über web gui openwrt-ath79-generic-tplink_eap225-v3-squashfs-factory.bin / Achtung mit Firefox kam es zu Verbindungsabbrüchen / Mit Google Chrome hat es geklappt
- Performance:
Performance direkt auf die Firewall - vom HP ProBook aus (rtw_8822ce, 5.10.0-0.bpo.5-amd64 , Debian Buste) über 5GHZ, Abstand ~30cm )

Push vom Notebook aus

urnilxfgbez@mrWhiteGhost:~$ iperf -c firewall -t 120 -i 60
------------------------------------------------------------
Client connecting to firewall, TCP port 5001
TCP window size: 85.0 KByte (default)
------------------------------------------------------------
[  3] local notebook port 48924 connected with firewall port 5001
[ ID] Interval       Transfer     Bandwidth
[  3]  0.0-60.0 sec  4.32 GBytes   619 Mbits/sec
[  3] 60.0-120.0 sec  4.06 GBytes   581 Mbits/sec

andere Richtung:

push von Firewall aus

root@mrGatekeeper:~# iperf -c notebook -t 120 -i 60
------------------------------------------------------------
Client connecting to notebook, TCP port 5001
TCP window size: 85.0 KByte (default)
------------------------------------------------------------
[  3] local firewall port 36766 connected with notebook port 5001
[ ID] Interval       Transfer     Bandwidth
[  3]  0.0-60.0 sec  1.74 GBytes   250 Mbits/sec
[  3] 60.0-120.0 sec  1.69 GBytes   242 Mbits/sec
[  3]  0.0-120.0 sec  3.43 GBytes   246 Mbits/sec
Aruba 2930F
- Kein Temperatur Sensor bzw. „over-temperature“ sensor nicht auslesbar via SNMP - FAIL (Firmware: WC_16_11_0003.swi)
- Konvertieren der Syntax von HP ProCurve J9280A (HP2510G-48) zu Aruba JL254A (2930F) (WC_16_11_0003.swi):
Changes in Syntax HP Pro Curve -> HP Aruba 2930F:

Header im File beim upload:
; JL254A Configuration Editor; Created on release #WC.16.11.0003
; Ver #14:67.6f.f8.1d.9b.3f.bf.bb.ef.7c.59.fc.6b.fb.9f.fc.ff.ff.37.ef:44

Offenbar syntaktisches Laden von cli Elementen:
module 1 type jl254aa


sntp server 1.2.3.4 -> sntp server priority 1 1.2.3.4

read only snmp community:

snmp-server community "public"
- LACP Trunk entfernen:
Switchxx# configure
Switchxx(config)# show lacp

                                    LACP

           LACP      Trunk     Port                LACP      Admin   Oper
   Port    Enabled   Group     Status    Partner   Status    Key     Key
   -----   -------   -------   -------   -------   -------   ------  ------
   23      Active    Trk9      Down      No        Success   0       540
   24      Active    Trk9      Down      No        Success   0       540


Switchxx(config)# show trunks

 Load Balancing Method:  L3-based (default)

  Port   | Name                             Type       | Group Type
  ------ + -------------------------------- ---------- + ----- --------
  23     |                                  100/1000T  | Trk9  LACP
  24     |                                  100/1000T  | Trk9  LACP


Switchxx(config)# no trunk 23-24
Switchxx(config)# show trunks

 Load Balancing Method:  L3-based (default)

  Port   | Name                             Type       | Group Type
  ------ + -------------------------------- ---------- + ----- --------
Aruba 5400R zl2
- Per Default ist DHCP aktiv d.h. er zieht sich eine Lease
- Zugriff per ssh und web per Default möglich
- Cli ist kompatibel zu alter Cli von HP Pro Curve Switches - show config :) Interface Namen müssen angepasst werden wegen modularem Aufbau zB: A1-A8 - ist auf Switch ersichtlich
- oom ist das out of band management d.h. das „Management“ interface
- Vorhandene Konfigurationen anzeigen und andere Config nach Reboot aktivieren:
HP-Switch-5406Rzl2# show config files

Configuration files:

 id | act pri sec | name
 ---+-------------+------------------------------------------------
  1 |  *   *   *  | default-config-dhcp
  2 |             | config-core-ported
  3 |             |
  4 |             |
  5 |             |


HP-Switch-5406Rzl2# startup-default pri config config-core-ported
This will change the default configuration file used when the switch boots.

Continue (y/n)? y
HP-Switch-5406Rzl2#
- CPU LOAD SNMP
OID
1.3.6.1.4.1.11.2.14.11.5.1.9.6.1.0
- Temperatur SNMP
OID
1.3.6.1.4.1.11.2.14.11.1.2.8.1.1.9.0
Aruba AP-505-RW
- Default Zugangsdaten (https://ip:4343)
- Benutzername: admin
- Passwort: Seriennummer siehe AP unten S/N:
- Default Web-UI Zertifikat austauschen (Firmware: 8.7.1.2, Hostname: wific2.schule.intern)
- Zertifikats Bundle besteht aus: cat SERVER-CERT.PEM > /tmp/bundle && cat CA.PEM » /tmp/bundle && cat RSA-KEY-CERT-CRYPTED » /tmp/bundle
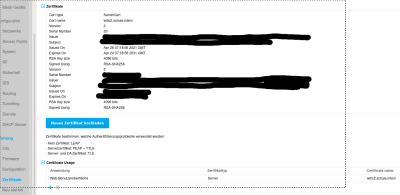


- Client Isolation muss auf der CLI zB: per SSH konfiguriert werden (Achtung commit apply nicht vergessen)(https://www.arubanetworks.com/techdocs/Instant_84_WebHelp/Content/instant-ug/services/clientisolation.htm) :
Configuring Client Isolation

To enable Client Isolation and disable all peer-to-peer communication, enable the deny-intra-vlan-traffic parameter in the respective WLAN SSID or wired profile. The following is the syntax to enable deny-intra-vlan-traffic under wlan ssid-profile and wired-port-profile command:

(Instant AP)(config) # wlan ssid-profile <profile name>

(Instant AP)(SSID Profile "<profile name>") # deny-intra-vlan-traffic


(Instant AP)(config) # wired-port-profile <profile name>

(Instant AP)(wired ap profile "<profile name>") # deny-intra-vlan-traffic

Aruba recommends that both Client Isolation and ARP poison check should be configured for enhanced sec..
- Web Kategorie Filter für bestimmtes WLAN blockieren (https://www.arubanetworks.com/techdocs/Instant_84_WebHelp/Content/instant-ug/apprf/url-filtering.htm)

- Nice to Know: AP's müssen Zugriff zu aruba.brightcloud.com haben / sonst greifen die Filter nicht / d.h. es wird dynamisch aus der Cloud die Zugriffsanfrage bearbeitet / inspected
- Gästenetz ohne VLANs konfigurieren - falls es nicht möglich ist / Achtung NetworkManager mag diese Variante nicht obwohl per dhclient eine IP kommt


Aruba 7010 WLAN Controller
- Default gateway über Web GUI lässt sich nicht ändern es bleibt der Alte
- Zugriff per SSH im richtigen Konfigurationskontext (Cisco lässt grüßen :) )
(controller) >enable
Password:****
Password:****

(controller) #show ip route

Codes: C - connected, O - OSPF, R - RIP, S - static
       M - mgmt, U - route usable, * - candidate default, V - RAPNG VPN

Gateway of last resort is Imported from DHCP to network 0.0.0.0 at cost 10
Gateway of last resort is Imported from CELL to network 0.0.0.0 at cost 10
Gateway of last resort is Imported from PPPOE to network 0.0.0.0 at cost 10
C    IP_NETWORK/MASK is directly connected, VLAN1
C    IP_NETWORK/MASK is directly connected, VLAN100
C    IP_NETWORK/MASK is directly connected, VLAN101

(controller) #show running-config | include gateway
Building Configuration...
ip default-gateway IP_DEFAULT_GATEWAY

(controller) #configure terminal
Enter Configuration commands, one per line. End with CNTL/Z

(controller) (config) #no ip default-gateway IP_CURRENT_DEFAULT_GATEWAY
(controller) (config) #ip default-gateway IP_NEW_DEFAULT_GATEWAY
(controller) (config) #write memory
Saving Configuration...

Configuration Saved.

(controller) (config) #exit
(controller) #show running-config | include gateway
Building Configuration...
ip default-gateway IP_NEW_DEFAULT_GATEWAY
- Controller herunter fahren
(BRG-Neusiedl) #halt
WARNING: THIS COMMAND WILL TERMINATE ALL WEBUI, TELNET AND SSH SESSIONS.
Please only execute this command from the local console.
Do you really want to halt the system(y/n): y
System will now halt! Please wait...Connection closed by foreign host.
Connection to wific1.schule.intern closed.
Aruba InstantOn 1930 - 48G 4SFP/SFP+
- Einzig mir bekannter lüfterloser 48Gbit Switch
- Default Username: admin Password: „leer/keines“
- Default IP Konfiguration: DHCP ,zieht sich eine Lease
- Kann auch lokal gemanaged werden im Gegensatz zu den InstantOn AccessPoint Produkten


- Verbrauch mit einem Gbit Anschluss aktiv: 17 Watt
- Achtung: Nachdem Management IP und VLAN geändert wurden trat folgendes auf (Browser wechseln auf Google Chrome/Firefox Problem ?):

- 3m DAC Kabel von: https://www.amazon.de/gp/product/B08CB3KZTJ/ref=ppx_yo_dt_b_asin_title_o07_s00?ie=UTF8&psc=1 (JD097C-C) funktioniert NICHT in Zusammenhang mit : https://www.amazon.de/gp/product/B01GHTXHMK/ref=ppx_yo_dt_b_asin_title_o07_s01?ie=UTF8&psc=1 (10Gtek® 10GbE PCIE Netzwerkkarte für Intel X520-DA1-82599EN Chip, Single SFP+ Port, 10Gbit PCI Express x8 LAN Adapter, 10Gb NIC) - Switch System Heartbeat LED leuchtet orange + SFP+ Anschluss bis das Modul entfernt wird
- 3m DAC Kabel von: https://www.amazon.de/gp/product/B079CCQC6Z/ref=ppx_yo_dt_b_asin_title_o06_s00?ie=UTF8&psc=1 funktioniert (J9283D) mit oberer Netzwerkkarte / kostet Lawine , es handelt sich um das Originalkablel, das laut Manual unterstützt wird
- SFP+ Modul auf RJ45 10Gbit wird erkannt - https://www.amazon.de/dp/B08GQX79LQ?psc=1&ref=ppx_yo2ov_dt_b_product_details - Firmware Version: 2.5.0 u. Firmware Version: 2.9.0
 - Temperatur beträgt (gemessen mit Infrarot ) zwischen 34-40 Grad Celsius (Auslastung ~2Gbit / alleiniges Modul im Switch / Umgebung 21 Grad Celsius, Verbrauch ~3-4 Watt)
LWL - Verkabelung
- Was kann ich aus diesem Kabel herauslesen ?
- Multimode 50/125 / OM2 is der Standard / LC ist der „kleine“ Stecker / SC der „große“ breite der ins Panel kommt

- Achtung bei LC AB bzw. wie bei Switch X SFP↔LC↔SC↔LC↔SFP Switch Y angesteckt wird - überkreuzt , sonst kein Link auf Modulen (getestet mit MultiMode 850nm SFP+ Modulen)
- Achtung es kann mit LED Taschenlampe (zB: Smartphone) geleuchtet werden bei SC Patchpanel ob sie bei der anderen Seite terminieren - visuelle Überprüfung - ob das Licht ankommt :)
- 10Gbit - sollten möglich sein Telefonat mit HP Support „kann funktionieren kann aber nicht garantiert werden ob stabil und vernünftig erst ab OM4“ - an einem Kundenstandort funktionierts mit 10Gbit und OM2
- Ist SFP mit SFP+ kompatibel ?
- Das Format selbst ist grundsätzlich kompatibel aber das spezifische Modul muss auf Kompatibilität überprüft werden
- Auszug aus dem Manual von einem HPE Switch zur Kompatibilität d.h. in den Manuals der Switches sollten sich die Details zur Kompatibilität befinden

- SFP Module unterschiedlicher Switchhersteller können kompatibel sein und funktionieren zB: HPE Switches mit D-Link Switches und SFP Modulen mit LWL Verkabelung
- Die Nachbaumodule von 10Gtek (https://www.amazon.de/gp/product/B01LWIJF5O/ref=ppx_yo_dt_b_search_asin_title?ie=UTF8&psc=1) (https://www.amazon.de/gp/product/B07JYW8CNX/ref=ppx_yo_dt_b_search_asin_title?ie=UTF8&psc=1) sind kompatibel mit HPE 1950 Switches
- Die Nachbaumodule von StarTech (https://www.startech.com/de-at/netzwerk-io/jd092b-st) sind kompatibel mit HPE1950 Switches
- Die Nachbaumodule (Single Mode) von CONBIC (https://www.amazon.de/gp/product/B084KSZGVY/ref=ox_sc_saved_title_10?smid=A2EVE1XIALSEGE&psc=1) sind kompatibel mit HPE1950 Switches
Yubikey
- Yubico - YubiKey 5 NFC (https://www.amazon.de/gp/product/B07HBD71HL/ref=ppx_yo_dt_b_asin_title_o04_s00?ie=UTF8&psc=1)
- Default Password: 123456
- Getestet mit Debian Buster / Kernel 5.9 bpo / Firefox 78.7
- Achtung Firefox mit firejail / Firefox hat per Default keinen Zugriff aufs Device / Vorher Dongle einstecken dann Firefox starten
Firefox Troubles:
https://bugs.debian.org/cgi-bin/bugreport.cgi?bug=965097

siehe zB: vim /etc/firejail/firefox-common.profile +43

vim /etc/firejail/firejail.config +22
browser-disable-u2f no
- Test des Dongles
- apt-get install yubico-piv-tool ykcs11
- Firefox Security Provider:
https://developers.yubico.com/yubico-piv-tool/YKCS11/Supported_applications/firefox.html


Micro 10G Firewall - HUNSN (RJ50F)
- Variante mit 32GB RAM und 512GB M.2 SSD (wird als INTEL erkannt) auch die 10G interfaces und die Netzwerkinterfaces
- Stromverbrauch bei ~20 Watt mit 4 virtuellen Gastmaschinen
- Achtung Bei Debian Bookworm und der grub Konfiguration für die ursprünglichen Netzwerk Interface Bezeichnung (GRUB_CMDLINE_LINUX=„net.ifnames=0“ → ethxx) dürfte es zu einer Race Condition beim Laden der Module bekommen - die Interface Bezeichnungen „springen“ sobald ein Link auf den SFP+ interfaces besteht → Lösung GRUB_CMDLINE_LINUX=„net.ifnames=0“ rausnehmen aus der Konfiguration für grub (/etc/default/grub) und die Interfaces durch systemd Magic manuell spezifizieren zB:
root@FooMeister:/etc/systemd/network# cat 000-eth2-persistent-net.link
[Match]
MACAddress=11:22:33:44:55:66

[Link]
Name=eth2
Micro Firewall - HUNSN (RJ03)
- Variante mit Intel N5105 u. 16 GB RAM u. 128GB M.2 SSD
- Stromverbrauch zwischen ~10-13 Watt im Betrieb - nice :)
- * Achtung bei Migration von Legacy Boot Produkten - UEFI Boot beachten
Virtualisierung
CMD Allerlei
- Convert RAW Disk to VHD mit Virtualbox:
VBoxManage.exe convertdd disk.raw disk.vhd --format VHD
- VHDX File mounten und lesen:
    apt-get install libguestfs-tools

    guestmount --add BACKUP.vhdx --inspector --ro /mnt
Antiviren-Dashboards
Nanoheal
- Deinstallation manuell anstoßen:
 Anonymous

Sollte die Deinstallation über die Nanohealconsole nicht funktionieren, kann der Uninstaller über die Kommandozeile aufgerufen werden:

"C:\Program Files\Nanoheal\Client\cutil.exe" -5
10 months ago
know-how/etc.txt · Zuletzt geändert: 2024/04/19 10:23 von cc